In summary:
- Stunted crops in an otherwise green field are a classic sign of a hidden hardpan restricting root growth.
- A penetrometer is the primary tool for diagnosing compaction, but visual inspection in a soil pit provides crucial corroborating evidence.
- Treatment must match the diagnosis: severe, deep hardpans may require a subsoiler, while biological tillage with radishes can fix moderate compaction over time.
- Preventing re-compaction by managing axle loads and tire pressure is as critical as the initial treatment.
Every farmer has seen the paradox: a field that looks lush and green from the road, yet certain zones consistently underperform at harvest. You’ve checked for nutrient deficiencies and pest pressure, but the problem persists, leaving you with patches of yellowing, stunted crops that seem to run out of steam mid-season. The common reaction is often to assume a deep-seated issue and consider aggressive, expensive measures like deep ripping across the entire area. But this approach is like performing surgery without an X-ray.
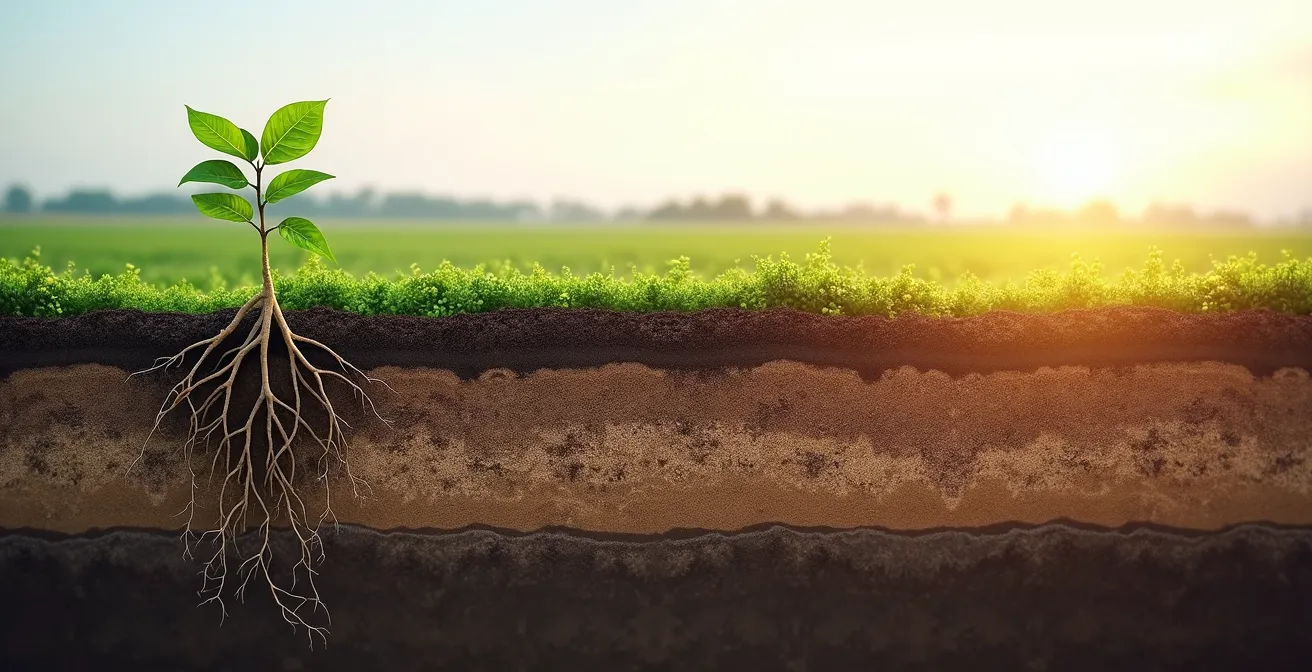
The true culprit is often invisible from the surface: a dense, compacted layer known as a hardpan. This physical barrier acts like a subterranean ceiling, blocking roots from accessing the water and nutrients stored in the deeper soil profile. But what if the key wasn’t just to acknowledge its existence, but to become a soil detective? What if, instead of resorting to brute-force solutions, you could conduct a forensic investigation to understand the precise depth, thickness, and nature of your hardpan?
This guide moves beyond generic advice and provides a systematic diagnostic framework. We will equip you with the methods to map your enemy, analyze the evidence, and choose a targeted prescription—whether mechanical or biological—to break through these barriers. By learning to read the clues your soil provides, you can move from reactive treatments to a proactive strategy that restores your soil’s structure and unlocks its full yield potential.
This article will guide you through the complete diagnostic process, from initial visual clues to advanced soil sampling, and finally to choosing the most effective and sustainable solution for your specific field conditions.
Summary: A Farmer’s Guide to Uncovering and Treating Soil Hardpans
- Why Green Fields Can Still Hide Severe Root Restriction?
- How to Use a Penetrometer to Map Field Compaction Zones?
- Subsoiler or Radish: Which Breaks Hardpans More Effectively?
- The Rooting Issue That Cuts Drought Tolerance in Half
- How to Calculate Optimal Tire Pressure to Save Your Roots?
- How to Take Soil Samples That Reveal Deep Hardpans?
- Why Frequent Harrowing Destroys Soil Aggregates?
- How to Improve Soil Structure in Heavy Clay Without Tillage?
Why Green Fields Can Still Hide Severe Root Restriction?
The most deceptive aspect of a hardpan is its ability to remain hidden beneath a seemingly healthy crop. During periods of adequate rainfall and early growth, topsoil moisture and nutrients are sufficient, allowing for vigorous foliage development. This creates a dangerous illusion of health, masking the underlying crisis happening in the root zone. The plant, unable to grow its roots downward, initiates a survival mechanism known as compensatory growth. It invests its energy into producing more leaves and stems to maximize photosynthesis from the limited resources it can access.
This phenomenon was observed in a study on Alabama’s Coastal Plain, where radish cultivars planted in compacted soils produced more foliage and total dry matter than those in non-compacted soils. The plants were literally overcompensating above ground for the restrictions below. However, this strategy is a short-term fix. As the season progresses and the topsoil dries out, the shallow-rooted plants have no access to the deep-soil moisture, leading to sudden stress, wilting, and significant yield loss. This hidden vulnerability is why soil compaction is so economically damaging; Iowa State University Extension reports that it can result in a 10% to 20% loss in yields.
Alabama Study on Compensatory Growth
Research in Alabama’s Coastal Plain found that while no radish cultivars could penetrate hardpans denser than 1.7 g cm-3, ‘Tillage’ radishes in compacted soils produced more foliage and total dry matter. This indicates a compensatory growth pattern where the plant focuses on above-ground biomass when root penetration is severely limited, demonstrating how plants can appear healthy despite a critical root restriction.
Therefore, a green field is not a reliable indicator of soil health. The first step in a proper soil investigation is to look past the surface-level appearance and actively search for evidence of subsurface barriers, especially in areas that consistently underperform or show stress during dry spells.
How to Use a Penetrometer to Map Field Compaction Zones?
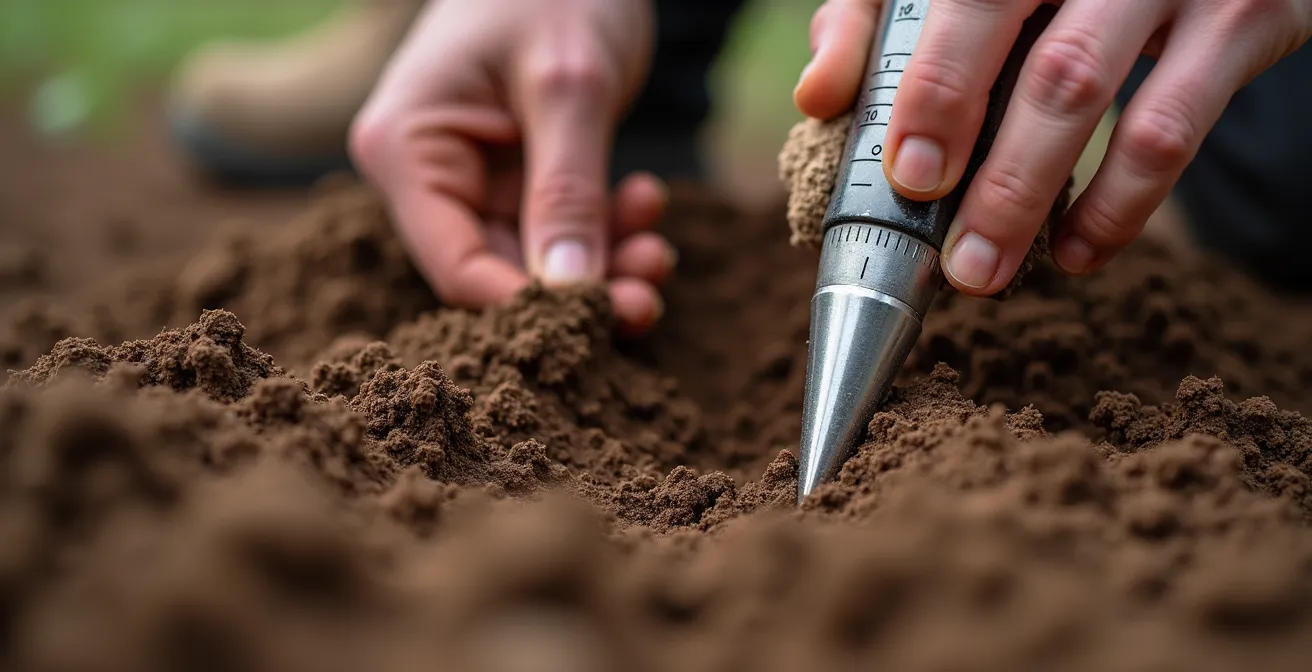
The single most important tool in your diagnostic arsenal is the soil penetrometer. This device measures soil resistance in pounds per square inch (psi) as you push it into the ground, acting as a mechanical root that identifies precisely where compaction layers begin and end. While visual inspection of stunted plants provides a clue, the penetrometer provides the hard data needed for a targeted intervention. Mapping a field is not a random process; it requires a systematic approach to generate a reliable picture of your soil’s structure.
The key to accurate readings is soil moisture. Testing should be done when the soil is at field capacity—typically about 24 hours after a soaking rain. Dry soil will give artificially high readings, while saturated soil will be too soft. Spring is often the ideal time for this task. Pushing the penetrometer into the ground at a slow, steady rate of about one inch per second, you will feel the resistance change. The critical number to watch for is 300 psi. While some roots can find their way through pores in soil with higher resistance, 300 psi is the generally accepted threshold where root growth becomes significantly restricted.
The goal is to record two depths: where the pressure first exceeds 300 psi (the top of the hardpan) and where it drops back below 300 psi (the bottom of the hardpan). This tells you both the location and the thickness of the compacted layer, which is vital information for choosing a treatment.
Your Field Investigation Protocol: Mapping Compaction
- Timing is everything: Take readings when soil is at field capacity, ideally in the spring, approximately 24 hours after a soaking rain.
- Select the right tool: Use the appropriate cone size for your soil type—a 3/4″ diameter cone for soft soils or a 1/2″ cone for hard soils.
- Conduct the test: Insert the penetrometer slowly and steadily (about one inch per second) until you reach the 300 psi resistance threshold.
- Record the evidence: Note the depth where resistance first exceeds 300 psi and the depth where it drops below it. This defines the top and bottom of your hardpan.
- Map the area: Take systematic readings every 100 to 150 feet across the field, aiming for 3-4 readings per acre to create a comprehensive compaction map.
By taking multiple readings in a grid pattern across the affected area, you can create a subsurface map that reveals the extent and severity of the problem. This map is the foundation of your entire treatment plan, allowing you to move from guesswork to a precise, data-driven strategy.
Subsoiler or Radish: Which Breaks Hardpans More Effectively?
Once you have diagnosed and mapped your hardpan, the next step is to prescribe a treatment. The two primary options represent a choice between immediate mechanical force and long-term biological action: the subsoiler and cover crops like forage radish. The decision is not about which is “better,” but which is the right tool for your specific diagnosis. A subsoiler, or deep ripper, is an aggressive, high-horsepower implement designed to physically shatter dense hardpans. Its primary advantage is speed and power; it provides an immediate fracture, creating channels for root growth in a single pass.
However, this is an expensive and energy-intensive operation. Furthermore, unless the underlying cause of compaction (like heavy equipment traffic) is addressed, the soil can re-compact, making subsoiling a temporary fix. In contrast, “biological tillage” using deep-rooted cover crops like forage or tillage radish offers a slower but more holistic solution. These plants grow a powerful taproot that can naturally penetrate and break up compacted layers. When the radish dies and decomposes, it leaves behind open channels for subsequent cash crop roots and improves soil structure by adding valuable organic matter.
A project in Maine demonstrated this effectively, where integrating forage radish with no-till practices broke up hardpans and improved drainage within a year, while also providing nutrient capture benefits. The critical limitation, however, is the hardpan’s density. Research has shown that even tillage radishes cannot effectively penetrate hardpans with a bulk density greater than 1.7 g/cm³. For these severe cases, mechanical fracturing with a subsoiler may be the only viable first step, followed by cover crops to maintain the improved structure.
The following table, based on data from a SARE project report, helps compare these two approaches.
| Factor | Subsoiler | Radish Cover Crops |
|---|---|---|
| Initial Cost | High (equipment purchase/rental) | Low (seed cost only) |
| Horsepower Required | High horsepower needed | None (biological action) |
| Hardpan Depth Limit | Can reach any depth | Cannot penetrate hardpans >1.7 g cm-3 |
| Soil Structure Impact | Immediate fracturing | Gradual improvement with organic matter |
| Long-term Benefits | Temporary unless combined with cover crops | Nutrient capture and retention benefits |
| Best Application | Severe hardpan requiring immediate action | Moderate compaction with time for biological improvement |
The Rooting Issue That Cuts Drought Tolerance in Half
A hardpan is more than just a physical barrier; it’s a direct threat to your crop’s water security. Its primary damage is the creation of what is effectively a “perched water table” in the topsoil. When roots are confined to a shallow layer, they can only access a fraction of the soil’s total water-holding capacity. The deep moisture reserves that would normally sustain a crop through dry periods remain completely out of reach, locked away below the impenetrable layer. This dramatically reduces the crop’s resilience to drought.
Consider the scale of the problem: research shows that hardpan layers can extend anywhere from 10 cm to 75 cm below the surface. If a crop’s roots are stopped at 20 cm, it has lost access to over two-thirds of the potential rooting zone in many soil profiles. During a mid-season dry spell, a shallow-rooted crop will exhaust its available water in days, while a deep-rooted crop in healthy soil could thrive for weeks. The hardpan essentially cuts your soil’s “battery life” for water storage in half, or even more.
Furthermore, the issue is twofold. During heavy rainfall, the same impermeable layer that blocks roots also prevents water from draining downwards. This leads to waterlogged topsoil, anaerobic conditions, and an increased risk of root diseases. The plant is trapped in a boom-and-bust cycle: too much water during wet periods and not enough during dry ones. A hardpan creates both flooding and drought conditions in the same field, a devastating combination that directly impacts nutrient uptake, plant health, and ultimately, your bottom line.
The inability to access deep water is the most critical consequence of an undiagnosed hardpan. It’s the silent yield killer that turns a moderate dry spell into a full-blown crop failure. Understanding this mechanism reinforces the urgency of diagnosing and treating these restrictive layers to build a more resilient and productive agricultural system.
How to Calculate Optimal Tire Pressure to Save Your Roots?
Diagnosing and treating a hardpan is only half the battle. The other half is prevention. The leading cause of man-made hardpans is surface compaction from heavy machinery, and the single most important factor you can control is tire pressure. Running tires at the high pressures required for road transport creates a small, hard footprint in the field, concentrating the vehicle’s entire weight onto a small area and driving compaction deep into the soil profile. The goal is to set your tire pressure to the lowest safe level for the load being carried, creating a larger, longer footprint that distributes the weight more evenly.
The process of determining this optimal pressure is a precise calculation, not guesswork. First, you must weigh each axle of your tractor after it has been properly ballasted and, if applicable, with mounted equipment in the raised transport position. This gives you the maximum load each tire will bear. With this data, you can consult the load and inflation tables provided by your tire manufacturer. These tables will specify the minimum inflation pressure required to safely carry that specific load. This pressure is often significantly lower than the maximum pressure stamped on the tire’s sidewall.
The impact of this adjustment is profound. For instance, research clearly shows that tires run at 35 psi created ruts that were more than twice as deep as tires run at 12 psi tire pressure. Modern tire technology, such as Increased Flexion (IF) and Very High Flexion (VF) tires, further enhances this benefit, allowing for even lower pressures. It’s also critical to remember that this is not a “set it and forget it” task. You must adjust inflation pressures whenever axle loads change and always check them when the tires are cold for an accurate reading. Managing tire pressure is the most effective form of preventative medicine for your soil structure.
On-Farm Axle Load and Tire Pressure Determination
To prevent compaction, first weigh each tractor axle when fully ballasted (and with mounted equipment raised) to determine the maximum load. Next, use the tire manufacturer’s load and inflation tables to find the lowest recommended pressure for that weight. Consider using IF/VF tires which can carry 20-40% more load at lower pressures. Always check and adjust pressures when tires are cold and whenever axle loads change significantly.
How to Take Soil Samples That Reveal Deep Hardpans?
While a penetrometer gives you quantitative data on resistance, it doesn’t tell you *why* the soil is compacted. To complete your diagnosis, you need to visually inspect the soil profile and potentially send samples for lab analysis. This requires digging a soil pit—a simple but profoundly insightful step. Using a shovel, dig a small pit or cross-section in a known problem area, ideally down to about 60 cm (2 feet). This gives you a direct window into your soil’s structure.
Once the pit is open, your forensic investigation can begin. First, examine the root patterns on the pit wall. In healthy soil, roots grow vertically downwards. In the presence of a hardpan, you will see roots growing horizontally along the top of the compacted layer, desperately searching for a crack or weak point. This visual confirmation is irrefutable evidence of a restrictive barrier. In heavy clay soils, you may also see signs of standing water or mottling (splotches of grey and rust colors), indicating poor drainage caused by the hardpan.
Next, use a simple knife blade as a low-tech penetrometer. Push the blade into the side of the pit at various depths. You will physically feel the difference in resistance as you enter the hardpan layer. The blade will be difficult to push in and may even “stick” when you try to remove it. This helps you pinpoint the layer’s exact location. To go a step further, you can take stratified soil samples: one from above the hardpan, one from within it, and one from below it. Sending these to a lab can confirm if the compaction is purely physical or if there’s an underlying chemical issue, such as in Solonetzic soils with high sodium content.
Remember, even if your penetrometer reads above the 300 psi resistance threshold, visual inspection is still necessary, as roots can sometimes exploit natural cracks and pores that a penetrometer cone will miss. The soil pit provides the ultimate ground truth to confirm your instrumental readings.
Why Frequent Harrowing Destroys Soil Aggregates?
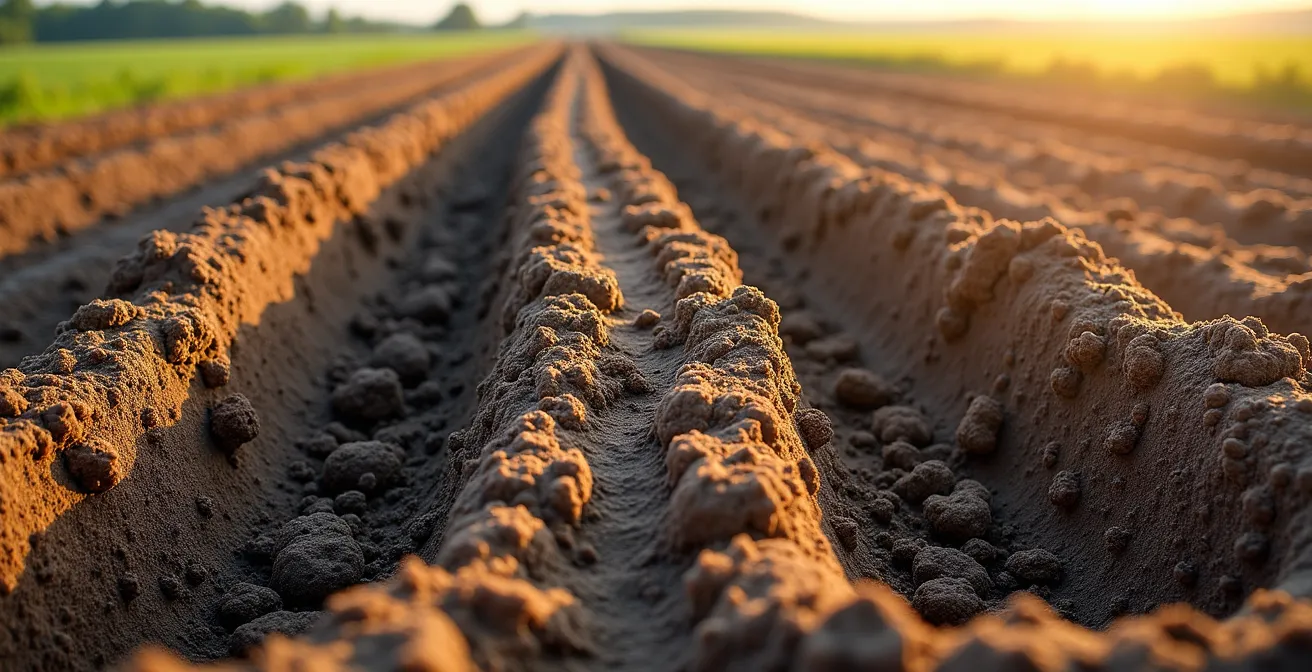
While some hardpans are caused by the weight of machinery, others are created or worsened by tillage practices themselves, particularly frequent and aggressive harrowing. Healthy soil is not just a collection of particles; it’s a structured matrix of soil aggregates—clumps of sand, silt, and clay held together by organic matter and biological glues. These aggregates create the pore space necessary for air, water, and root movement. Harrowing, especially with implements like disc harrows, is a mechanically violent process that pulverizes these aggregates.
Each pass breaks down the soil structure, leaving behind finer, separated particles. When heavy rain falls on this destructured soil, the force of the raindrops further shatters any remaining aggregates, and the fine clay particles are washed into the pores below. This process, known as surface sealing or crusting, effectively clogs the soil’s plumbing. The fine particles settle and compact, creating a dense, man-made hardpan just below the tillage depth, often called a “plow pan.”
This problem is exacerbated in certain soil types. For instance, in Solonetzic soils common in regions like Saskatchewan and Alberta, a naturally occurring dense B-horizon is high in sodium and clay. Tillage can bring this sodium to the surface, where it causes clay particles to disperse and cement together, forming an incredibly dense, almost concrete-like hardpan that is impermeable to water and roots. The very act of trying to “fluff up” the soil through harrowing can, over time, destroy its internal architecture and create the exact problem you were trying to solve.
The Formation of Solonetzic Hardpans
In parts of Saskatchewan and Alberta, Solonetzic soils contain a natural hardpan layer high in clay and sodium. This layer is already dense and inhibits water and air movement. Tillage practices can worsen this condition by mixing the soil profile, which can lead to the sodium cementing particles together even more tightly, severely restricting root growth and nutrient flow.
Understanding this mechanism is crucial for long-term soil health. It highlights the importance of minimizing tillage intensity and frequency to preserve the delicate soil aggregates that form the foundation of a productive field.
Key Takeaways
- A proper diagnosis must precede any treatment. Using a penetrometer and digging a soil pit are non-negotiable first steps.
- The choice between mechanical subsoiling and biological tillage with cover crops depends entirely on the severity and depth of the hardpan.
- Hardpans drastically reduce drought tolerance by preventing roots from accessing deep soil moisture, making this a critical water management issue.
- Preventing re-compaction through careful management of tire pressure and axle loads is essential for long-term soil health.
How to Improve Soil Structure in Heavy Clay Without Tillage?
Once a hardpan has been identified, especially one exacerbated by tillage in heavy clay soils, the goal is to rebuild the soil structure without resorting to further mechanical destruction. This long-term rehabilitation focuses on chemical and biological processes to encourage natural soil aggregation. One of the most effective methods for clay soils with high sodium content is the application of gypsum (calcium sulfate). Sodium causes clay particles to disperse and seal off pores, but calcium has the opposite effect.
When gypsum is applied, the calcium displaces the sodium on the clay particles. This allows the individual clay particles to “flocculate,” or clump together, forming larger aggregates. This process re-opens the pore spaces in the soil, dramatically improving drainage and aeration. When combined with deep, slow watering, the application of gypsum helps to flush the displaced sodium out of the root zone, leading to a lasting improvement in soil structure without any mechanical intervention.
This chemical approach can be powerfully combined with a biological one: planting a diverse mix of cover crops designed for “biological tillage.” Different species have different strengths. A mix might include:
- Oilseed Radish: Its deep, thick taproot is excellent for breaking through moderate compaction and scavenging nitrogen.
- Annual Ryegrass: It develops a dense, fibrous root system that is superb for building topsoil structure and loosening surface compaction.
- Oats: It works well with radish, providing good biomass to build organic matter and also scavenging for nitrogen.
However, a crucial caveat remains: if the hardpan is severe, even the strongest cover crop roots may be blocked. In such cases, a one-time mechanical fracturing with a subsoiler might be necessary to create an initial opening, followed by a consistent cover cropping program to rebuild and maintain the soil structure for the long term.
Begin your own soil investigation today. By applying these diagnostic principles, you can move beyond treating symptoms and start healing the root cause of poor yields, unlocking the true potential hidden beneath your fields.