
The fastest way to boost farm efficiency isn’t buying a new tractor, but by upgrading the intelligence of your existing equipment.
- Smart sprayers and section controls can cut input costs by up to 50%, often paying for themselves in 3-4 years.
- Retrofitting older tractors with modern tech like ISOBUS is feasible but requires a strict compatibility audit to avoid costly “integration debt”.
Recommendation: Calculate the specific Return on Investment (ROI) for your operation; don’t assume a new tractor is the default best investment for pure efficiency gains.
For farmers operating on a limited budget, the perennial question of capital expenditure looms large: invest in a brand-new tractor or upgrade the implements pulled by the existing one? The conventional wisdom often favors the allure of new iron—more horsepower, greater fuel efficiency, and a comfortable cab. These are valid points offering incremental gains in operational ease and small reductions in running costs. However, this perspective often overlooks the more potent, and faster, financial returns available elsewhere.
The core of the debate shouldn’t be about new versus old, but about the velocity of ROI. It’s a strategic shift from simply replacing an asset to enhancing the intelligence of the entire system. Investing in a smart sprayer, a variable-rate controller, or a sophisticated telemetry system can deliver transformational gains by drastically cutting input costs, which directly impacts the bottom line much faster than the marginal fuel savings of a new engine. This approach treats your current tractor not as an outdated liability, but as a power unit ready for an intelligence upgrade.
But this path is not without its challenges. The world of precision agriculture is fraught with technical complexities, from ISOBUS compatibility issues to software mismatches that can create significant “integration debt”—the hidden cost of making disparate systems work together. This analysis will dissect the financial and technical trade-offs, providing a clear framework. We will explore where the fastest ROI lies, how to successfully retrofit legacy equipment, and how to leverage data to unlock savings you may not have known were possible.
This article provides a comparative analysis to help you decide where your next dollar will work hardest. We’ll break down the return on investment for key smart implements, outline the technical steps for upgrading older equipment, and explore how to use the resulting data to maximize profitability.
Summary: A Farmer’s Guide to Investing in Efficiency
- Why a Smart Sprayer Pays for Itself Faster Than a New Cab?
- How to Retrofit ISOBUS Controllers on Legacy Equipment?
- Section Control or Pulse Width Modulation: Which Saves More Chemical?
- The Software Version Mismatch That Bricks Your Field Computer
- How to Adjust Hydraulic Down-Force for Variable Soil Types?
- How to Upgrade Old Tractors with Smart Sensors for Under $5,000?
- Manufacturer Telemetry or Third-Party Systems: Which Integrates Better?
- How to Utilize Tractor Telemetry to Cut Fuel Costs by 15%?
Why a Smart Sprayer Pays for Itself Faster Than a New Cab?
The primary driver for investing in smart implements over a new tractor is the speed at which the investment begins to pay you back. While a new tractor cab offers comfort and might marginally improve operator endurance, a smart sprayer directly attacks one of the largest variable costs on the farm: chemicals. The potential savings are not incremental; they are transformational. For instance, some targeted application technology demonstrates a 50% reduction in post-emergence herbicide use. This is a direct, measurable cash saving that accumulates with every pass across the field.
This concept is about calculating the velocity of ROI. To aid in this, agricultural economists have developed tools to help farmers make data-driven decisions. Montana State University Extension, for example, developed the Smart Spray Annual ROI Calculator in 2023. This tool allows farmers to input their own operational numbers to see a specific payback period. As experts note, these precision practices aren’t universal solutions; they require a case-by-case analysis. A new tractor’s value is spread over 10-15 years, whereas a smart sprayer’s cost can be recouped much faster through input savings alone.
This table, based on industry data, illustrates the stark difference in payback periods. The initial cost of a Pulse Width Modulation (PWM) system is significant, but the annual chemical savings accelerate its return on investment far beyond what can be achieved through the fuel efficiency of a new tractor.
| System Type | Initial Cost | Chemical Savings | Annual Savings (1,000 acres) | Payback Period |
|---|---|---|---|---|
| Traditional Pressure-Based | Base | 0% | $0 | N/A |
| PWM System (Capstan) | +$25,000 | 4-5% | $5,000-7,500 | 3-5 years |
| Individual Nozzle Control | +$30,000 | 5-7% | $7,500-10,500 | 3-4 years |
Ultimately, the choice hinges on financial strategy. A new cab is a capital depreciation expense focused on operator welfare, while a smart sprayer is an active investment generating measurable, rapid returns. For a budget-conscious operation, the math clearly favors upgrading the implement’s intelligence.
How to Retrofit ISOBUS Controllers on Legacy Equipment?
One of the most powerful ways to upgrade an older tractor’s intelligence is by retrofitting it with an ISOBUS controller. This technology creates a universal “plug-and-play” communication standard between the tractor, its implements, and a single in-cab terminal. As the Baltic Diagnostics Agricultural Division notes, “Retrofitting older machinery with ISOBUS involves installing compatible hardware and software to allow the machinery to communicate with other ISOBUS-compatible devices.” This eliminates the need for multiple, brand-specific control boxes, streamlining operations and enabling advanced functions like variable rate application and automatic section control on equipment that was never designed for it.
However, this process is not without risk. A failed or improper installation can lead to significant “integration debt”—the unforeseen time and money spent troubleshooting compatibility issues. The key to success is a thorough pre-purchase audit to ensure your legacy tractor has the foundational electrical and hydraulic capacity to support the new system. Without this due diligence, you risk buying an expensive kit that your tractor cannot properly power or control. The illustration below highlights the key connection points that must be assessed during a retrofit.

The image shows the precise nature of the components involved. Each connection, from the main power supply to the CAN-bus communication line, is a potential point of failure if not correctly specified and installed. To avoid costly mistakes, a systematic audit is non-negotiable.
Your 5-Point ISOBUS Retrofit Audit Checklist
- Power System Verification: Confirm the tractor’s existing electrical system can provide a minimum of 30A on a 12V power supply dedicated to the ISOBUS system.
- Hydraulic Capacity Check: Measure the tractor’s hydraulic flow and compare it against the new implement’s requirements, which are typically between 20-40 L/min for continuous operation.
- Communication Bus Audit: Inspect all existing wiring harnesses for ISO 11783 compatibility and verify that the CAN-bus terminating resistor is present and correctly installed.
- In-Cab Terminal Assessment: Evaluate the available physical space in the cab for securely mounting the InCab plug and the Universal Terminal (UT) display without obstructing visibility or controls.
- ECU Compatibility Confirmation: Before purchasing, cross-reference the implement’s Electronic Control Unit (ECU) with the chosen retrofit kit’s compatibility list (e.g., ISO FIT Basic vs. full system) from the manufacturer.
Section Control or Pulse Width Modulation: Which Saves More Chemical?
Once you’ve decided to invest in a smart sprayer, the next technical decision is choosing between Section Control and Pulse Width Modulation (PWM). Both technologies aim to reduce chemical waste by preventing overlap, but they operate on different principles and offer varying levels of precision. Section Control is the more established technology; it turns entire boom sections on and off as the sprayer enters or leaves previously covered areas. It’s effective for reducing major overlaps in straight-line passes and on headlands.
Pulse Width Modulation, however, offers a much higher degree of precision. Instead of shutting off entire sections (which can be several feet wide), PWM controls each individual nozzle. By varying the rate at which each nozzle opens and closes (its duty cycle), it can maintain a constant application rate and droplet size across a wide range of speeds. More importantly, it enables turn compensation—slowing down the spray rate on the inner nozzles and speeding it up on the outer nozzles during a turn to ensure even coverage. This level of control is where the most significant savings are found, especially in irregularly shaped fields. In fact, research published in Nature Scientific Reports shows a potential 30-50% pesticide reduction through the use of advanced PWM technology.
A real-world example comes from Chafer Machinery’s implementation of the Raven Hawkeye PWM system. Field performance data demonstrates an average of 5% annual savings on chemical and fertilizer bills. The system’s integrated gyroscopes are key to its effectiveness, automatically adjusting the duty cycle (from 25-100%) for each nozzle during turns. This prevents both over-application, which wastes money, and under-application, which can compromise efficacy. For a farmer weighing the options, Section Control offers a good first step, but PWM delivers the surgical precision that maximizes chemical savings and accelerates the return on investment.
The Software Version Mismatch That Bricks Your Field Computer
The biggest risk in choosing smart implements over a new, integrated tractor is managing the “integration debt” that comes with software and firmware. In a mixed-brand environment, where a tractor from one manufacturer is connected to a controller from a second and an implement from a third, a single software update can create a cascade of failures. A firmware patch intended to add a feature to one component can render it incompatible with another, effectively “bricking” your entire system in the middle of a critical planting or spraying window.
This is not a hypothetical problem. Manufacturers may not rigorously test their updates against all third-party hardware combinations, and in some cases, updates can be a form of forced obsolescence, subtly disabling features on older connected equipment to encourage upgrades. The financial and operational cost of a downed system during a time-sensitive period can quickly erase any savings gained from the initial investment. The only defense is a disciplined and proactive approach to software management. Never perform an update in the field or without a verified backup and a rollback plan.
A rigid pre-season protocol is the best insurance against in-field disasters. Before the season begins, dedicate time to updating and testing all components in a controlled environment. This simple checklist can save you from catastrophic downtime.
- Create a Full System Backup: Before any update, create a complete backup of all system data, including field boundaries, prescription maps, machine profiles, and guidance lines.
- Check Compatibility Matrices: Visit manufacturer websites and farmer forums to check for any known issues or conflicts with your specific combination of tractor, display, and implement firmware versions.
- Download on Stable Internet: Always download firmware updates to a clean USB drive using a reliable, high-speed internet connection, never over a cellular connection in the field.
- Update in a Controlled Environment: Perform the updates in the workshop with the equipment connected to a stable power source (not just the tractor battery) to prevent corruption from power fluctuations.
- Test All Functions Post-Update: After the update, systematically test every function at low speed—steering, section control, rate changes, etc.—before deploying the equipment for field work.
- Document Everything: Keep a detailed log of the firmware versions installed on every component (tractor, GPS receiver, display, implement ECU). This documentation is invaluable for troubleshooting with tech support.
How to Adjust Hydraulic Down-Force for Variable Soil Types?
Investing in a smart planter goes beyond simple GPS guidance; it means controlling the physical interaction between the implement and the soil. One of the most critical adjustments is hydraulic down-force. The goal of down-force is to ensure the planter’s row units maintain consistent seed depth across the entire field, regardless of variations in soil texture, moisture, and compaction. Too little pressure, and the seed is placed too shallowly, leading to poor germination. Too much pressure, and you create sidewall compaction, which restricts root growth and wastes fuel.
Modern hydraulic down-force systems allow the operator to set and often automatically adjust this pressure from the cab. However, the correct setting is entirely dependent on the soil type. A light, sandy soil requires far less pressure than a heavy, wet clay soil. As you move across a field with variable soil types, the ideal down-force changes. The illustration below provides a conceptual look at how different soil conditions require different pressure settings to achieve optimal seed placement.
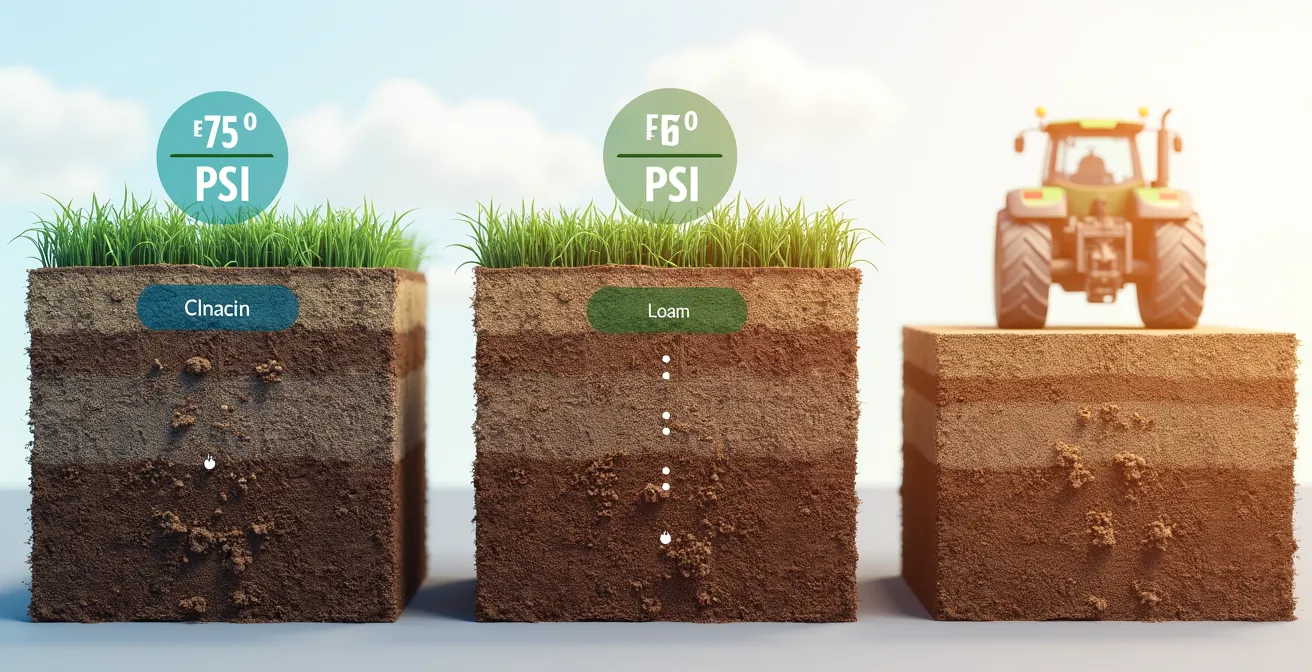
As the visual demonstrates, a single “set-it-and-forget-it” pressure is inefficient. To truly capitalize on the investment, the operator must understand how to calibrate these settings. Data from Purdue University Extension provides a clear starting point for these calibrations, linking soil types to specific pressure ranges and highlighting the risks associated with incorrect settings.
The following table provides a practical guide for setting down-force based on field conditions. This is not a substitute for checking seed depth in the field, but it serves as an excellent baseline for initial calibration.
| Soil Type | Recommended PSI Range | Typical Depth Achievement | Risk of Over-Pressure |
|---|---|---|---|
| Sandy/Light | 50-100 PSI | 1.5-2 inches | Compaction below seed |
| Loam/Medium | 100-150 PSI | 1.75-2.25 inches | Sidewall compaction |
| Clay/Heavy | 150-250 PSI | 1.5-2 inches | Surface crusting |
How to Upgrade Old Tractors with Smart Sensors for Under $5,000?
The idea of adding precision agriculture capabilities to an older tractor can seem daunting and expensive. However, a full-scale, top-of-the-line system is not the only option. For farmers with a limited budget, a modular upgrade path is the most financially sound strategy. By phasing in technology over several years, you can spread out the cost and begin seeing a return on investment from the very first component. The goal is to add layers of precision incrementally, starting with the technology that provides the biggest “bang for the buck.” A total investment of under $5,000, staged over three to four years, can transform a 15-year-old tractor into a highly capable precision machine.
The journey often begins with enhancing guidance. A simple GPS receiver paired with an LED lightbar provides a significant improvement over manual steering by reducing overlap and operator fatigue. The next logical step is to add an entry-level auto-steer motor, which further improves pass-to-pass accuracy and frees up the operator to focus on the implement’s performance. Only after mastering guidance does it make financial sense to move into variable rate control for a specific implement.
This phased roadmap, based on common industry component pricing, illustrates how a farmer can build a sophisticated system on a budget. Each step builds upon the last, ensuring no investment is wasted and that the system can grow with the operation’s needs and budget.
- Year 1 (Investment: ~$1,200): Install a GPS receiver with WAAS/EGNOS correction and an LED lightbar for manual guidance. This foundational step immediately achieves 6-12 inch pass-to-pass accuracy, reducing overlap on spraying and tillage.
- Year 2 (Investment: ~$2,500): Add an entry-level auto-steer motor kit to the steering column. This improves accuracy to the 2-inch range (with a future RTK unlock) and significantly reduces operator fatigue during long days.
- Year 3 (Investment: ~$1,000): Install a basic ISOBUS-compatible rate controller for your primary implement (e.g., a sprayer or spreader). This unlocks the ability to use prescription maps for variable rate application.
- Optional Year 4 (Investment: ~$300/year): For sub-inch accuracy required by planting or strip-tilling, add a cellular RTK correction subscription. This leverages the existing hardware for the highest level of precision without investing in a physical base station.
Manufacturer Telemetry or Third-Party Systems: Which Integrates Better?
When it comes to telemetry—the wireless collection and transmission of machine data—farmers face a choice: stay within a single manufacturer’s ecosystem (e.g., John Deere’s JDLink, CNH’s AFS Connect) or opt for a third-party, brand-agnostic system like those from Trimble or AgLeader. The manufacturer systems promise seamless integration and a single point of contact for support, which is appealing. However, this advantage often disappears in a real-world mixed-fleet operation, where tractors, combines, and sprayers may come from different brands.
In a mixed-fleet environment, a manufacturer-specific system can create data silos. The data from a green tractor may not easily integrate or display on the same platform as data from a red combine, forcing the farm manager to juggle multiple apps and websites to get a complete picture of the operation. This is where third-party systems often provide a superior solution. They are designed from the ground up to be manufacturer-agnostic, focusing on universal standards like ISOBUS to communicate with any color of equipment.
This flexibility can be a significant long-term advantage, allowing the farmer to purchase the best machine for the job, regardless of brand, without worrying about data compatibility. It also prevents “vendor lock-in,” where leaving a brand’s ecosystem means losing historical data and familiar workflows.
Case Study: The Flexibility of Third-Party Integration
Trimble’s Field-IQ ISOBUS Advanced solution serves as a strong example of manufacturer-agnostic integration. The system is designed to work through any major third-party display, regardless of the tractor’s brand. A key feature is its one-time cloud-based configuration that stays with the implement, not the tractor. This means a farmer can hook a planter equipped with Field-IQ to a John Deere tractor one day and a Case IH tractor the next, and the system functions identically without any repetitive setup. This demonstrates that third-party systems can offer superior operational flexibility and efficiency for the common reality of mixed-fleet farms.
Key Takeaways
- Focus on ROI Velocity: Smart implements, especially sprayers, offer a much faster payback period (3-5 years) through input savings than the incremental fuel efficiency gains of a new tractor.
- Audit Before You Buy: Retrofitting older tractors with ISOBUS is a powerful strategy, but a pre-purchase audit of your tractor’s electrical and hydraulic capacity is essential to avoid costly failures.
- Manage Your Software: In a mixed-brand environment, disciplined software and firmware management is non-negotiable to prevent “integration debt” and catastrophic in-field downtime.
How to Utilize Tractor Telemetry to Cut Fuel Costs by 15%?
While smart implements offer savings on inputs, tractor telemetry provides a powerful lens into the single largest operating cost: fuel. By collecting and analyzing data on engine load, idle time, and operator behavior, telemetry systems can uncover significant inefficiencies that are invisible from the driver’s seat. While some smart tractor implementations demonstrate 10-18% fuel savings from GPS autopilot alone by eliminating overlap, a dedicated telemetry system can push savings even further by optimizing the entire operation.
The data can reveal, for example, that an operator is consistently running the tractor at too high an RPM for a given task, or that a specific field route results in excessive idle time on headland turns. These small, repeated inefficiencies add up to substantial fuel waste over the course of a season. By turning this data into actionable feedback—either through real-time alerts to the operator or in post-season performance reviews—farm managers can cultivate more efficient driving habits across their entire team. This turns fuel management from guesswork into a data-driven science.
Case Study: Unexpected Returns from Fuel Monitoring
An agricultural enterprise that installed DFM D differential fuel flow meters on its vehicle fleet saw surprising, multi-faceted returns, as documented in an analysis by Technoton. The primary goal was to monitor fuel consumption, and the system delivered, achieving a 30% reduction in overall fuel use. The unexpected benefit was that the system completely eliminated fuel theft. This, in turn, led to a 15% increase in operator productivity. With the opportunity for fuel theft removed, drivers improved their operating habits and worked more efficiently to maintain their previous income levels, revealing a powerful human element to the ROI of telemetry.
This demonstrates that the value of telemetry extends beyond simple fuel monitoring. It provides a layer of accountability and operational transparency that can unlock productivity gains and curb losses in ways that a new tractor, by itself, simply cannot. It is the ultimate tool for optimizing the performance of every asset and operator in the fleet.
To truly enhance your farm’s efficiency, the next logical step is to move from theoretical knowledge to practical application. Begin by using an ROI calculator to analyze the potential payback of a smart sprayer for your specific acreage and crop types. This data-driven approach will provide the clarity needed to make the most profitable investment for your operation’s future.
Frequently Asked Questions on Smart Implement Integration
What information should I have ready when calling tech support?
Have your tractor model, implement model, all firmware version numbers, any error codes displayed on the terminal, and a clear sequence of the actions that led to the failure documented. The more precise information you can provide, the faster they can diagnose the issue.
How can I force a firmware rollback in the field?
While it varies by manufacturer, most systems allow for a firmware rollback via a USB recovery drive. The typical process involves holding a physical reset button on the display while powering it on, which boots it into a recovery menu where you can select a previous, stable firmware version from the USB stick.
What are signs of forced obsolescence through updates?
Be wary of patterns. Signs can include older but previously functional implements suddenly losing features after a display update, new and unexplainable error codes appearing for equipment that was working perfectly, or a sudden requirement for dealer-only diagnostic tools to perform basic calibrations that were previously user-accessible.