In summary:
- High-yield corn overwhelms standard settings; losses stem from material flow bottlenecks, not just speed.
- Perform a “kill stall” to scientifically diagnose whether losses originate at the header, rotor, or cleaning shoe.
- Optimize the cleaning system as a unit; increasing fan speed alone without adjusting the chaffer can worsen shoe losses.
- Adjust rotor speed based on grain moisture, not just the manual. Wet corn requires slower speeds to prevent cracked kernels.
- Treat the harvest as a logistical system. A combine waiting for a grain cart is a major, and preventable, source of lost potential.
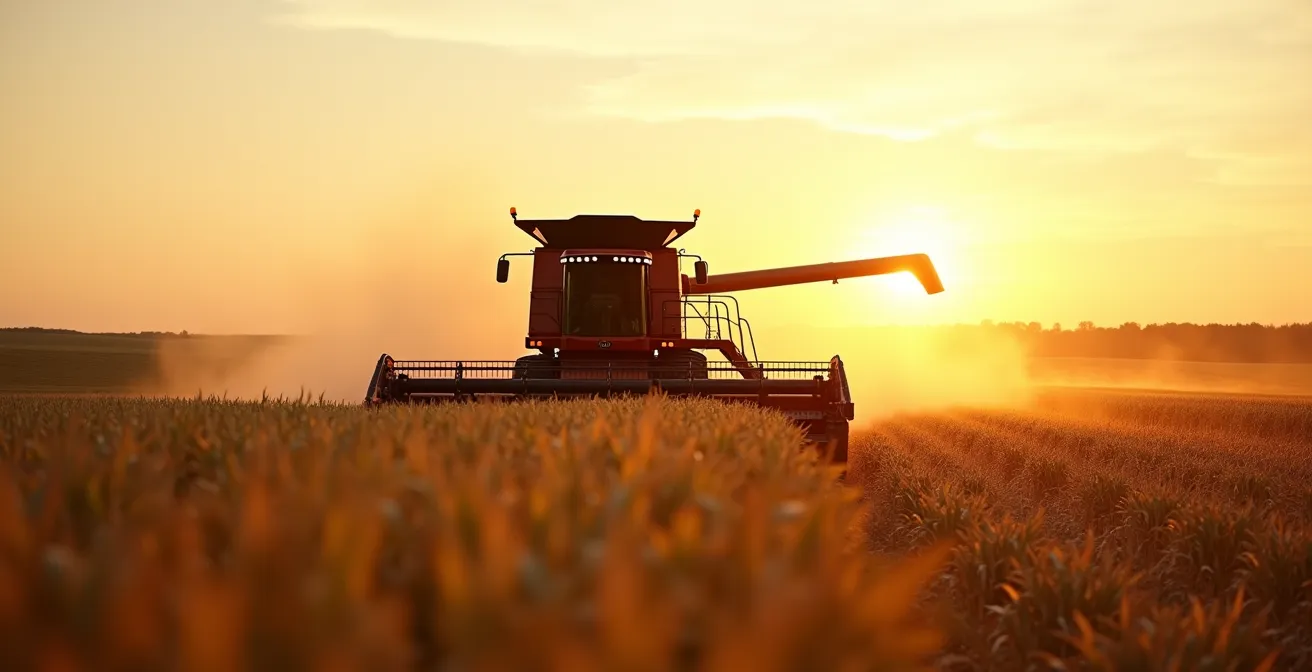
For combine operators, high-yielding corn is a double-edged sword. The satisfaction of seeing massive yields is often tempered by the frustration of seeing potential profit scattered on the ground. When dealing with huge amounts of biomass, the common advice to “slow down” or “tweak the settings” feels inadequate. The machine groans, the sample gets dirty, and header loss seems unavoidable. The core issue isn’t just about speed; it’s about the fundamental physics of moving a massive volume of material through a fixed–sized machine. Every component, from the gathering chains to the residue chopper, is pushed to its operational limit.
Many operators fall into the trap of addressing symptoms rather than causes. A dirty grain tank sample prompts an immediate increase in fan speed, which can paradoxically blow more grain out the back. Suspected rotor loss leads to wider concave settings, which may reduce threshing efficiency. The real key to minimizing harvest loss in these demanding conditions is to stop guessing and start diagnosing. It requires thinking like a mechanical engineer, viewing the combine not as a single unit, but as a series of interconnected systems. The goal is to identify the specific bottleneck in the material flow and address it with precise, data-driven adjustments.
This guide moves beyond generic advice. We will dissect the combine’s functions to provide advanced, efficiency-focused strategies. We’ll explore how to perform a diagnostic kill stall, master the delicate balance of the cleaning shoe, optimize logistics to keep the machine moving, and fine-tune the threshing system to preserve every last kernel. It’s time to take control of the physics of your harvest.
To help you navigate these advanced techniques, this article is structured to follow the path of the crop material through the machine, from initial diagnosis to final residue management.
Summary: A Mechanical Guide to Reducing Corn Harvest Losses
- Why Increasing Fan Speed Doesn’t Always Clean the Sample?
- How to Perform a Kill Stall to Pinpoint Grain Loss Sources?
- Draper or Auger Header: Which Feeds Beans Smoother?
- The Slug Feeding Habit That Burns Threshing Belts
- How to Spread Residue Evenly Across 40-Foot Cuts?
- How to Calibrate Combine Sensors to Match Elevator Readings?
- Why the Combine Should Never Wait for the Grain Cart?
- How to Adjust Rotor Speed to Minimized Cracked Grain?
Why Increasing Fan Speed Doesn’t Always Clean the Sample?
When an operator sees excess MOG (Material Other than Grain) in the tank, the first instinct is to increase fan speed. The logic seems sound: more air should blow away more chaff. However, this often backfires, increasing grain loss out the back. The cleaning shoe is a delicate balancing act between air pressure and mechanical separation. The fan’s job is to create a cushion of air that lifts the lighter chaff, allowing the heavier grain to fall through the chaffer and sieve. When fan speed is too high, it doesn’t just lift the chaff; it can carry perfectly good kernels right out of the machine. The cost of this mistake is significant, as research shows that losing just 2 kernels per square foot equals 1 bushel per acre loss.
The solution is to think of the fan and the chaffer opening as a single, coordinated system. A wider chaffer opening requires more air volume to maintain the same pressure and lift. A tighter chaffer requires less. If you increase fan speed without considering the chaffer opening, you create excessive air velocity that overpowers the grain. The goal is to get a clean sample not through sheer force, but through creating the correct pressure to suspend chaff while allowing grain to drop. A slightly dirtier sample in the tank is often a profitable trade-off compared to invisible, high-velocity losses over the cleaning shoe. Proper air pressure balance is far more critical than raw fan speed.
Achieving this balance requires a methodical approach, not random adjustments in the field. The key is to find the point where chaff is effectively removed without lifting and expelling valuable grain, a process that must be re-evaluated as moisture conditions change throughout the day.
How to Perform a Kill Stall to Pinpoint Grain Loss Sources?
When you find excessive kernel loss behind the combine, how do you know where it’s coming from? Is it the header dropping ears, the rotor failing to separate, or the cleaning shoe being overwhelmed? A “kill stall” is the single most effective diagnostic procedure an operator can perform to answer this question. It involves running the combine with a full load of material, then simultaneously shutting down the engine and the separator. This freezes the entire material flow process in place, creating a snapshot of what’s happening inside the machine at peak load.
Once the machine is safely stopped, you can analyze the material in each distinct zone. Check the ground under the header for pre-harvest and header-specific losses. Then, open the access panels and examine the material inside. Is there a thick mat of unseparated grain on the rotor? This points to a rotor speed or concave clearance issue. Are there clean cobs with kernels still attached? This suggests the threshing system is not aggressive enough. Is the cleaning shoe completely buried under a thick layer of MOG and grain? This indicates a fan speed or chaffer/sieve problem. The value of this diagnostic is immense.
Case Study: Nebraska Farm Kill Stall Analysis
A Nebraska study demonstrated the kill stall method’s effectiveness. By performing a kill stall, farmers were able to differentiate pre-harvest losses (1.2 bu/acre) from total post-harvest losses on the ground (5.2 bu/acre). This allowed them to isolate the 4 bushels/acre being lost specifically during the harvesting operation. This data enabled them to make targeted adjustments to concave and fan settings, directly addressing the machine’s contribution to loss instead of guessing.
This procedure transforms you from a reactive operator into a proactive diagnostician. Instead of just seeing loss on the ground, you can pinpoint the system bottleneck and apply the correct fix, saving significant yield over the course of the harvest.
By analyzing each zone, from the feeder house to the shoe, you gather precise data on where the system is failing under load. This empirical evidence is far more valuable than any “book setting” and is the foundation of high-efficiency harvesting.
Draper or Auger Header: Which Feeds Beans Smoother?
While the title references beans, the principle of smooth feeding is paramount in high-yield corn, and the technology choice at the header is critical. The header is the first point of contact and sets the stage for the entire material flow dynamic. Uneven, slug-fed material from the header will disrupt every subsequent process, from threshing to separation. In high-biomass corn, traditional gathering chains on older auger-style corn heads can struggle. They can cause stalk breakage and random ear orientation, leading to the “slugs” that choke rotors and burn belts. Modern designs, often using belts instead of just chains, are engineered to address this specific problem.
The primary advantage of belt-based heads is their ability to grip the stalk lower and provide a more uniform, butt-first delivery of the ear into the feeder house. This consistent orientation is the foundation of smooth material flow dynamics. It prevents the random tumbling that can lead to shelling on the header plates and ensures the rotor is fed a consistent stream of material, maximizing its threshing capacity. While these heads may require more initial investment and power, their performance in heavy corn is undeniable.
Regardless of header type, matching the gathering speed to the ground speed is a fundamental rule. For chain-driven heads, the Ohio State Extension recommends maintaining a precise ratio, such as 55 RPM on the chains for a 4 mph ground speed, to gently catch the ears without shelling them at the point of entry. The goal is to lay the stalks onto the header, not slap them back.
| Feature | Traditional Gathering Chains | Modern Belt-Based Heads |
|---|---|---|
| Feeding Consistency | Variable with stalk diameter changes | More uniform across conditions |
| Ear Orientation Control | Limited – random positioning | Better butt-first delivery |
| Power Requirement | Lower initial investment | 15-20% higher but smoother operation |
| High-Yield Performance | Prone to slugging at >250 bu/acre | Maintains flow at 300+ bu/acre |
| Maintenance Frequency | Every 50-100 acres adjustment | Season-long stability |
Ultimately, the best header is the one that delivers the most consistent, manageable stream of material to the threshing system, allowing the rest of the combine to operate at its peak design efficiency.
The Slug Feeding Habit That Burns Threshing Belts
Slug feeding—where a large, dense wad of material enters the threshing system at once—is the enemy of efficient harvesting. It spikes rotor pressure, leads to incomplete threshing, and is a primary cause of premature wear on expensive threshing belts and drives. While machine settings play a role, slugging is often a habit born from how the operator engages with the crop, especially in fields with variable conditions like downed or diseased corn. The most common cause is attempting to harvest too fast through a tough patch or making aggressive turns at the end rows with the header still engaged.
Corn harvest loss represents a ‘double hit’ — economic loss from reduced yield and future crop yield drag due to volunteer corn.
– Trey Stephens and Vipin Kumar, University of Nebraska Managing Corn Harvest Loss Study
Preventing slugs begins before the combine even enters the field. Proactive scouting is essential. Identifying areas with high stalk rot or lodging allows the operator to plan a different strategy for those specific zones. This might mean reducing ground speed *before* hitting the problem area, or even harvesting in one direction only to ensure the header is lifting the downed corn properly. This preemptive approach is far more effective than reacting to the groaning sound of a slug hitting the rotor.
Case Study: Pre-Harvest Scouting’s Impact on Slug Prevention
In Nebraska fields with significant stalk rot, operators who performed pre-harvest “push tests” on plants were able to map out high-risk zones. In areas where more than 10% of plants failed the test, operators adjusted their strategy. By reducing ground speed and adopting one-way harvesting patterns in these specific areas, they were able to reduce slugging incidents by 60% compared to operators who maintained normal harvesting patterns throughout the entire field.
This demonstrates that avoiding slugs is as much about field strategy as it is about machine settings. It requires an operator to read the field ahead and make adjustments to their driving habits, ensuring a smooth, consistent crop flow that allows the machine to perform at its best.
By treating the crop with mechanical sympathy and feeding the machine a consistent diet of material, operators can dramatically improve throughput, reduce wear, and put more clean grain in the tank.
How to Spread Residue Evenly Across 40-Foot Cuts?
In a high-yield environment, the combine isn’t just a grain harvester; it’s a residue processor. A 40-foot corn head harvesting 250-bushel corn generates a massive amount of stover. How that material is managed by the chopper and spreader at the back of the combine has significant implications for the next year’s crop. Uneven spreading creates a thick “residue mat” in some areas and leaves others bare. This leads to inconsistent soil warming, uneven moisture levels, and poor seed-to-soil contact for the planter, which can cause emergence problems and phantom yield loss in the following season.
Achieving a full-width, even spread across a 40-foot cut requires active management and calibration; it doesn’t just happen. The spreader vanes must be meticulously adjusted. A common mistake is setting them symmetrically. In reality, you must account for external factors, most notably crosswinds. Even a slight breeze can shift your spread pattern by several feet. The best practice is to slightly bias the spreader vane angles into the wind to counteract this drift. Furthermore, the chopper knife clearance must be set correctly—typically around 1/16th of an inch—to ensure the residue is sized properly for rapid decomposition and doesn’t create a “fluffy” mat that is difficult to spread.
The only way to know if your spread is truly even is to measure it. A “tarp test” is a simple but effective method. By placing tarps at regular intervals across the entire width of the cut, harvesting a short distance, and then weighing the material collected on each tarp, you get a quantitative map of your spread pattern. This data allows you to make precise, informed adjustments to your vane angles until the distribution is uniform.
Your Action Plan: Residue Spreader Calibration Protocol
- Conduct tarp test: Place tarps at 5-foot intervals across the entire swath width to be measured.
- Harvest 100 feet over the test area and then collect all the residue from each individual tarp.
- Weigh material from each collection point to create a data-driven map of your current spread pattern.
- Adjust spreader vane angles to correct imbalances; a common starting point is a 1-2 degree adjustment per 5 feet of width needed.
- Account for crosswind by biasing the vane angles slightly upwind to counteract material drift.
- Set chopper knife clearance to a tight 1/16 inch to ensure residue is optimally sized for even flow and fast decomposition.
- Balance the power consumption of an aggressive chop with the spread quality required for your specific tillage system.
This final stage of material handling is just as important as the threshing and cleaning. Taking the time to calibrate the residue system pays dividends in the planter pass and beyond.
How to Calibrate Combine Sensors to Match Elevator Readings?
The yield monitor is the operator’s primary scorecard. Yet, many operators trust the number on the screen without question, even when it feels “off.” Over time, all sensors—mass flow, moisture, and others—are subject to “sensor drift” due to vibration, wear, and changing conditions. Relying on an uncalibrated or single-point calibrated monitor in a high-yield environment is like using an unverified map. You’re moving, but you don’t really know where you are. Accurate calibration is what turns raw data into profitable decisions, especially when harvesting high-moisture corn where small errors can have large financial consequences.
A single calibration load at the beginning of the season is not enough. Multi-point calibration across a range of flow rates and moisture contents is essential for accuracy. A proper protocol involves harvesting several separate, weighed loads (e.g., 5,000-8,000 lbs each) at different speeds and in different areas of the field to capture variability. You then compare the monitor’s reading for each load to the certified scale ticket and adjust the calibration factor accordingly. This process must be repeated whenever conditions change significantly.
Case Study: The Profitability of Multi-Point Calibration
Johnny Verell’s Tennessee operation provided a stark example of this principle’s value. By deciding to harvest corn at a high 28% moisture instead of waiting for it to dry to 15%, they captured a 12% yield gain, equating to 32 bushels per acre. The key to making this profitable was meticulous sensor calibration. They used multiple calibration loads at varying moistures, achieving a final sensor accuracy within 0.5% of the elevator tickets. This accuracy allowed them to confidently manage their drying costs, resulting in an additional profit of $50.88 per acre after all expenses were accounted for.
| Condition Change | Recalibration Needed | Impact if Ignored |
|---|---|---|
| Temperature shift >20°F | Yes – moisture sensor | 2-3% moisture reading error |
| 500 acres harvested | Yes – mass flow sensor | 1-2% yield drift |
| Variety change | Recommended | 0.5-1.5% accuracy loss |
| Moisture change >5% | Critical | 3-5% dry bushel error |
| Season mid-point | Mandatory verification | Cumulative 2-4% drift |
Without trustworthy data from your monitor, you are flying blind, unable to accurately assess the impact of your setting adjustments or make sound economic decisions about harvest timing.
Why the Combine Should Never Wait for the Grain Cart?
You can have the most perfectly tuned, highest-capacity combine in the world, but if its wheels aren’t turning and crop isn’t flowing, it’s nothing more than a million-dollar piece of idle iron. In the push for ever-higher throughput, the biggest bottleneck is often not the machine itself, but the logistics of getting the grain away from it. Every minute a combine spends waiting for the grain cart is a minute of lost productivity and lost profit. A simple economic analysis shows that a $1 million combine waiting 5 minutes costs approximately $25 in lost potential revenue. Over a long harvest season, this downtime adds up to a staggering figure.
Optimizing the harvest fleet ecosystem is a strategic imperative. The goal is to create a seamless, continuous flow where the combine never has to stop or even slow down to unload. This requires a systems-based approach, not an improvised one. Key elements of a high-efficiency system include:
- Dedicated “Grain Cart Highways”: Establish clear, parallel paths for the grain cart to travel, minimizing soil compaction and ensuring it can easily match the combine’s speed.
- Proactive Positioning: The cart operator’s job is to anticipate the combine’s needs. By calculating the combine’s fill time (tank capacity ÷ (yield × header width × speed)), the cart can be positioned to arrive just before the tank is full.
- Unloading on the Go: This should be the default procedure, not the exception. It is the single most important factor in maximizing the combine’s daily acreage capacity.
- Clear Communication: Simple, standardized radio protocols (e.g., “Location-Percent Full-ETA”) and telematics that share real-time location and fill status across the fleet are essential for coordination.
This transforms the grain cart from a reactive “fetch” vehicle into a proactive component of a larger harvesting machine. The focus shifts from individual machine performance to overall system throughput velocity.
By ensuring the combine is always the priority and is never kept waiting, you maximize the return on your most valuable asset and dramatically increase the number of acres you can cover in a day.
Key Takeaways
- Harvest loss in high-yield corn is a physics problem of material flow; diagnose the specific bottleneck before adjusting settings.
- A “kill stall” is the most powerful tool to determine if losses are from the header, threshing system, or cleaning shoe.
- Match rotor speed to moisture, not just the book setting. Wet corn requires a much gentler, slower rotor speed to avoid cracking.
How to Adjust Rotor Speed to Minimized Cracked Grain?
The final, and perhaps most critical, trade-off an operator manages is between threshing aggressiveness and grain quality. Cracked kernels and damaged grain are a direct deduction from the bottom line at the elevator. As stated in a guide from Bayer Crop Science, “The cylinder or rotor speed is the leading cause of grain damage by the combine.” The temptation in high-yield corn is to increase rotor speed to push more material through, but this is often the precise cause of the damage you’re trying to avoid. The goal is to use the lowest possible rotor speed that still achieves complete threshing.
This setting is not static; it is highly dependent on grain moisture. Dry, brittle corn (e.g., below 18% moisture) requires a much gentler touch and slower rotor speed to prevent kernels from shattering on impact with the concaves. Conversely, high-moisture corn is more pliable, but the cobs are tougher. Here, damage is less about shattering and more about the rotor’s aggressive action on wet, soft kernels. Finding the sweet spot is key.
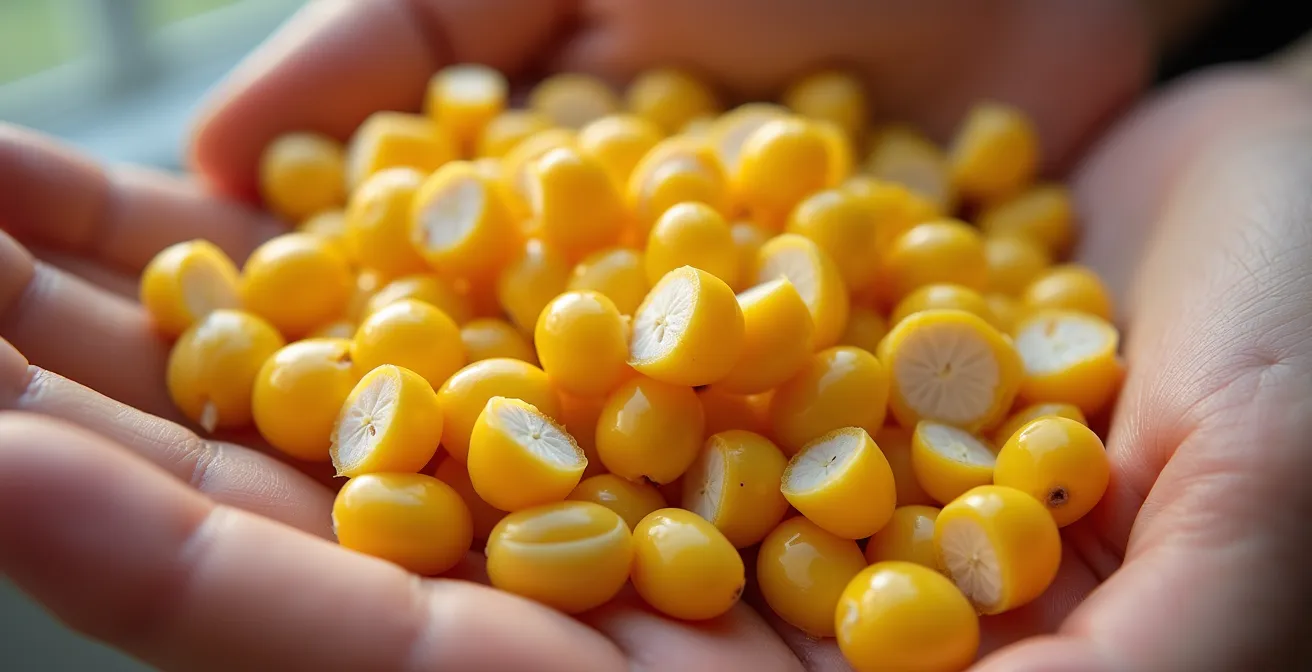
As the image above illustrates, the difference between a whole kernel and a damaged one is the difference between full value and a discount. The best practice is to start with the manufacturer’s recommended setting, then check for both unthreshed kernels on the cob and cracked kernels in the grain tank. If threshing is incomplete, slightly tighten the concave clearance first before resorting to increasing rotor speed. Often, a small adjustment in clearance can solve the problem without increasing damage.
Case Study: Moisture-Based Rotor Speed Optimization
An analysis of high-moisture corn (>22%) harvesting found that achieving good grain quality required a significant deviation from standard settings. Rotor speeds needed to be reduced by 50-100 RPM from the book values. When this slower speed was combined with the use of round bar concaves instead of large wire concaves, overall grain damage decreased by a staggering 60% while still maintaining 98% threshing efficiency. The critical finding was that in wet corn, damage is more often caused by excessive rotor speed than by an overly tight concave setting.
Ultimately, a perfect harvest isn’t just about how much you gather, but about the quality of every kernel that enters the grain tank. Start slow, make incremental adjustments, and let the condition of the grain be your ultimate guide.