
Breaking soybean yield barriers isn’t about spending more on inputs; it’s about surgically eliminating the specific agronomic and mechanical bottlenecks that cap your potential.
- Nutrient balance (like sulfur-to-nitrogen ratios) and precise timing are often more critical than total volume.
- Strategic decisions on maturity groups and variable-rate seeding have a greater ROI than uniform, high-input applications across an entire field.
Recommendation: Shift from a “blanket application” mindset to a “diagnostic and calibration” approach for every stage, from planting to harvest, to maximize your return on investment.
For any grain farmer who has invested in good genetics, solid fertility, and timely weed control, hitting a yield plateau is a familiar frustration. Your fields look good, the inputs are right, but the combine monitor tells the same story year after year, just shy of that next level. The conventional wisdom to simply add more nitrogen or plant thicker often leads to diminishing returns, increased costs, and new problems like late-season lodging. You’re doing everything right by the book, yet the needle isn’t moving.
This feeling of being stuck is a clear signal that the game has changed. The path to the next 10, 15, or even 20 bushels per acre isn’t found in doing more of the same. It’s about shifting your focus from broad strokes to surgical precision. What if the real key to unlocking higher yields isn’t in what you’re adding, but in what you’re not seeing? Hidden limiting factors—subtle nutrient imbalances, suboptimal plant spacing in specific zones, or microscopic losses at harvest—are the true thieves of yield potential.
This guide is for the performance-minded farmer ready to move beyond the plateau. We will dissect the critical control points in the soybean life cycle where small, data-driven adjustments can prevent major yield bottlenecks. We will treat your operation like a high-performance machine that needs precise calibration, not just more fuel. By adopting a mindset of diagnostic intervention and system optimization, you can identify and eliminate the specific constraints holding your yields back, turning potential into profitable, harvested bushels.
This article provides a detailed roadmap for identifying and correcting the hidden inefficiencies in your soybean production system. Below is a summary of the key performance areas we will calibrate to help you break through your current yield ceiling.
Summary: A High-Performance Guide to Shattering Soybean Yield Ceilings
- Why Adding More Nitrogen Won’t Help if Sulfur is Limiting?
- How to Use Tissue Sampling to Save a Stalling Crop?
- Long Maturity or Short Season: Which Yields More in Your Zone?
- The Planting Density Mistake That Causes Late-Season Lodging
- When to Spray Fungicide to Protect the Flag Leaf?
- Why Planting Thick in Sandy Knolls Lose You Money?
- Why Increasing Fan Speed Doesn’t Always Clean the Sample?
- How to Calibrate Planters for 99% Singulation Accuracy?
Why Adding More Nitrogen Won’t Help if Sulfur is Limiting?
The instinct to apply more nitrogen (N) to a crop that seems to be lagging is common, but in high-yield soybeans, this can be a costly mistake. The plant’s ability to utilize nitrogen for building proteins—the very engine of yield—is directly tied to the availability of sulfur (S). These two nutrients work in a synergistic partnership. Without adequate sulfur, nitrogen fixation by root nodules is impaired, and the plant cannot efficiently convert the nitrogen it has into yield. It’s like having a full tank of fuel but a clogged fuel filter; the engine can’t perform.
Modern farming practices, including cleaner air from reduced industrial emissions and the use of high-analysis fertilizers with little to no sulfur, have made sulfur deficiency a widespread limiting factor. The ideal N:S ratio in plant tissue is a critical metric to monitor. When this ratio is out of balance, adding more nitrogen only exacerbates the problem, leading to wasted input dollars and a stagnant yield curve. The focus must shift from a mindset of “more N” to one of “balanced nutrition.”
The performance gain from correcting this imbalance is significant. Research is consistently showing the power of a targeted sulfur strategy. For instance, Purdue University research demonstrated that sulfur applications can boost yields by 8 to 11 bushels per acre, particularly in early-planted soybeans. This gain was linked directly to more robust nodulation and improved nitrogen fixation, proving that sulfur is the key that unlocks nitrogen’s potential.
How to Use Tissue Sampling to Save a Stalling Crop?
A crop that looks healthy in June can inexplicably stall out in late July, just as it enters the critical pod-fill stage. This phenomenon, often called “hidden hunger,” is where the plant has just enough nutrients to maintain green color but not enough to power maximum yield. Waiting for visible deficiency symptoms like yellowing leaves is a losing strategy; by then, the damage is done. In fact, some research indicates that up to 75% of potential yield loss can occur before any visual cues appear. This is where proactive, diagnostic intervention becomes your most powerful tool.
Tissue sampling is the EKG for your soybean crop. It provides a precise, real-time snapshot of what the plant is actually absorbing, allowing you to identify nutrient shortages or imbalances weeks before they would become visible. This isn’t just about confirming a suspected problem; it’s about pre-empting one. By pulling samples at key growth stages (e.g., V4, R1, R3), you can build a trend line and make targeted foliar applications to correct deficiencies before they become a yield-limiting bottleneck.
The goal is to move from reactive to predictive nutrient management. This data-driven approach allows for surgical-strike foliar feeding, addressing the exact needs of the crop at the exact right time for maximum uptake and impact. A timely foliar application based on tissue test results can be the difference between a stalling crop and one that powers through to its full genetic potential.

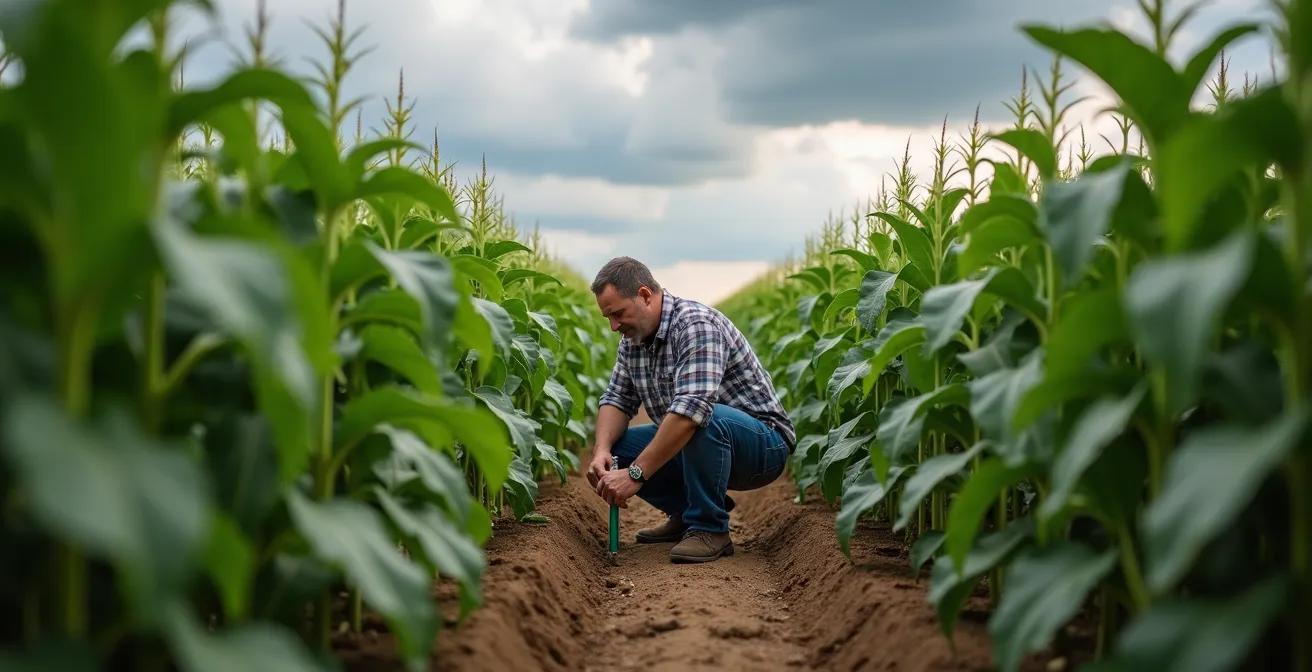
As the image shows, proper sampling technique—collecting the uppermost fully developed trifoliate leaves from multiple areas of a field—is crucial for an accurate diagnosis. This isn’t a random grab; it’s a calculated data collection process that forms the basis of a high-ROI rescue mission for your crop.
Action Plan: Rapid Response Foliar Protocol
- Interpret Sufficiency Ranges: Compare your tissue test results to established critical nutrient levels for the current growth stage (e.g., R3) to identify specific deficiencies.
- Select Product Form: Choose the most available nutrient forms for foliar uptake, such as chelated products for micronutrients (Zinc, Manganese) and high-purity salt forms for macronutrients.
- Time the Application: Spray during evening hours or on a cool, overcast day. Lower temperatures and higher humidity allow the leaf stomata to remain open longer, dramatically increasing absorption.
- Integrate with Zone Maps: Combine your tissue test data with NDVI or yield maps to create management zones. Apply foliar feeds at variable rates, targeting only the areas that need it most to maximize ROI.
- Schedule Follow-Up Sampling: Pull a second round of tissue samples 7-10 days after application to confirm the crop has responded and the deficiency has been corrected, ensuring your investment paid off.
Long Maturity or Short Season: Which Yields More in Your Zone?
One of the highest-leverage decisions you make all year happens long before the planter hits the field: selecting your soybean maturity groups. The common approach is to pick a “safe,” mid-range maturity for your area. However, to break yield plateaus, you need to think like a portfolio manager, balancing risk and reward. The data is overwhelmingly clear: fuller-season varieties that utilize the entire growing season almost always have a higher yield ceiling. They simply have more days to capture sunlight, build bigger plant factories, and fill pods.
This potential comes with risk, primarily an early frost that could cut the season short. This is where a strategic, multi-maturity approach pays dividends. Instead of planting 100% of your acres to a single relative maturity (RM), dedicating a portion to slightly shorter and slightly longer RM varieties spreads your risk. The shorter-season beans provide a hedge against an early fall, while the longer-season beans are your home-run hitters, poised to capitalize on a long, open autumn. The yield difference is not trivial; it’s a major driver of profitability.
The financial upside of optimizing this one decision is immense. According to a three-year University of Illinois study, every single point increase in maturity group was worth an additional 6 bushels per acre. In another one of their trials, the difference between the highest and lowest yielding variety based on maturity was a staggering 27.6 bushels per acre. This highlights that playing it too safe with maturity selection is often leaving significant, easily attainable yield on the table.
The following table outlines a portfolio strategy for managing maturity groups to balance risk while aiming for maximum yield across your operation.
| Strategy Component | Percentage of Acres | Risk/Reward Profile | Best Conditions |
|---|---|---|---|
| Ideal maturity group | 70% | Moderate risk, highest average yield | Normal rainfall patterns |
| Shorter maturity | 15% | Lower risk, frost protection | Early frost years |
| Longer maturity | 15% | Higher risk, highest potential | Extended fall, good moisture |
The Planting Density Mistake That Causes Late-Season Lodging
In the quest for higher yields, the temptation is to push seeding rates higher. The logic seems sound: more plants should equal more pods. However, this strategy often backfires, creating a dense, jungle-like canopy that leads to tall, spindly plants. These plants are structurally weak and highly susceptible to late-season lodging from a wind or rain event. When soybeans lodge, the canopy collapses, severely restricting light penetration, airflow, and ultimately, yield. It’s a classic case of more being less.
The problem is a biological response called shade avoidance. When plants are too close together, they compete for sunlight, causing them to stretch upwards and neglect stem thickness and root development. This creates the perfect storm for lodging. The ideal is to achieve a final stand that allows each plant enough space to develop a thick, sturdy stem and a full canopy without excessive competition. This allows for better light interception throughout the entire plant, not just at the top, and promotes more pods per plant.
Finding the economic optimum is key. You need just enough plants to maximize canopy closure by the summer solstice without triggering aggressive internode elongation. For most Midwest regions, data from several universities indicates the sweet spot for final plant stand is between 100,000 and 125,000 plants per acre in 30-inch rows. Pushing rates to 160,000 or higher rarely increases yield and dramatically increases the risk of losing it all to lodging.
The visual contrast is stark. The properly spaced plants on one side stand tall and are loaded with pods, while the overgrown, high-density stand next to it is a tangled, unproductive mess. This is a self-inflicted wound that is entirely preventable through proper population management and variety selection with good lodging scores. Dialing in the right seeding rate is a critical calibration for risk management and yield optimization.
When to Spray Fungicide to Protect the Flag Leaf?
In soybeans, the “money-making” part of the plant during the reproductive stages isn’t the whole canopy—it’s the leaves in the upper third. These leaves are the primary solar panels that produce the energy needed to fill pods. Protecting this part of the plant factory from yield-robbing diseases like frogeye leaf spot, septoria brown spot, and cercospora is a non-negotiable component of any high-yield strategy. A preventative fungicide application is not an expense; it’s an investment in preserving the yield potential you’ve spent all season building.
Timing is everything. Spraying too early misses the mark, and spraying too late is just damage control. The industry consensus and university research point to the R3 growth stage (when there is a 3/16-inch-long pod on one of the upper four nodes) as the ideal window for application. This timing ensures the fungicide is present to protect the critical upper leaves as they enter their peak energy-production phase for pod fill. It acts as a shield, keeping the plant factory running at 100% efficiency when it matters most.
The return on investment is consistent and compelling. Across the Midwest, countless trials show that a well-timed R3 fungicide application, like with Stratego YLD, consistently delivers a 3 to 4 bushels per acre increase, and often much more in years with high disease pressure. This protection is vital, a fact underscored by crop science experts. As Extension specialists from Crop Science US highlight, the stakes are high:
The upper canopy leaves during reproductive stages (R3-R5) contribute over 75% of the energy for pod fill.
– Extension specialists, Crop Science US fungicide recommendations
Losing even a fraction of that photosynthetic capacity to disease is a direct hit to your bottom line. Protecting that upper canopy isn’t just a good idea; it’s a core tenet of performance agronomy.
Why Planting Thick in Sandy Knolls Lose You Money?
Every field has variability. The productive, deep black soils and the sandy, low-organic-matter knolls. Treating them the same with a blanket seeding rate is one of the most common ways farmers leave money on the table. On those tough, sandy knolls, a high plant population is a recipe for disaster. The limited water-holding capacity means that by late summer, a dense stand of plants will be fighting each other for every drop of moisture, leading to intense stress, aborted pods, and ultimately, dismal yields. In these zones, you’re not just failing to get a return on your seed; you’re actively losing money.
This is where a variable rate seeding (VRS) strategy becomes a powerful profitability tool. By using a prescription map, you can strategically lower the seeding rate on those sandy knolls and other low-productivity zones. This gives each plant more access to limited resources, reducing stress and allowing them to be more productive than they would have been in an overcrowded environment. Meanwhile, you can maintain or even slightly increase populations in your high-productivity zones to push for top-end yield where the potential exists. It’s about putting the right number of seeds in the right environment.
The economic impact is twofold: you save money on seed costs by not over-planting the poor areas, and you increase the yield in those same areas by reducing plant-on-plant competition. This isn’t just about bushels; it’s a direct boost to your return on investment per acre. For instance, the Precision Planting high-yield program, which heavily utilizes variable rate technology, consistently demonstrates a positive ROI, with strategies like targeted fertilizer placement leading to a net return of +$10.00 per acre. This is a clear demonstration that managing inputs based on a zone’s true potential is far more profitable than a one-size-fits-all approach.
This table illustrates the clear financial benefit of adopting a variable rate strategy for those challenging parts of the field.
| Zone Type | Recommended Population | Seed Cost/Acre | Expected Yield Impact |
|---|---|---|---|
| Sandy Knoll | 110,000 seeds/acre | $48 | +4 bu/ac from reduced stress |
| Productive Zone | 150,000 seeds/acre | $60 | Baseline yield |
| Net Benefit | – | $12 savings | +$60/acre total gain |
Why Increasing Fan Speed Doesn’t Always Clean the Sample?
After a long season of meticulously managing a crop, the final act is getting it cleanly from the field into the grain tank. It’s heartbreaking to see hard-earned bushels blowing out the back of the combine. When faced with a dirty grain sample or high separator loss, the first instinct is often to crank up the fan speed to blow the material other than grain (MOG) away. However, this is a blunt-force approach that frequently does more harm than good. A high-velocity airstream can easily carry lighter soybean seeds right along with the chaff, sending them straight out onto the ground.
Optimizing combine cleaning performance is a delicate balancing act between fan speed, chaffer opening, and sieve setting. The goal isn’t just to blow trash out, but to create a stratified mat of material floating on a cushion of air. This allows the heavy grain to fall through the chaffer and sieve openings while the lighter MOG is carried out the back. If the fan speed is too high, it creates channels in the mat, preventing proper separation and blowing good grain out. If it’s too low, the mat becomes too dense, and grain rides out with the trash. It’s a system that requires finesse and calibration, not just brute force.
The cost of improper settings is alarmingly high. According to precision agriculture experts, improper combine adjustments can lead to harvest losses of up to 12%. At 80-bushel-per-acre yields, that’s nearly 10 bushels left in the field—a devastating financial hit that is almost entirely preventable. Taking the time to get out of the cab, check losses on the ground, and make small, incremental adjustments to the cleaning system is one of the highest ROI activities you can do during harvest.
Key Takeaways
- Yield plateaus are broken by identifying and fixing specific, often hidden, limiting factors—not by simply increasing overall inputs.
- Data is your most powerful tool. Tissue sampling, yield maps, and planter data provide the insights needed for precise, high-ROI interventions.
- Every stage is connected. A perfectly calibrated planter means nothing if harvest losses are high, and a great fertility program can be negated by the wrong maturity choice.
How to Calibrate Planters for 99% Singulation Accuracy?
The entire yield potential of your soybean crop is established in the few hours the planter is in the field. No amount of mid-season heroics can fully compensate for a poor planting job. The single most critical metric for planter performance is singulation—the ability of the seed meter to drop one seed, and only one seed, at the correct interval. Skips (missing seeds) and multiples (doubles or triples) create uneven stands that sacrifice yield from day one. Skips leave bare ground that will be overtaken by weeds, while multiples create intense competition that results in weak, unproductive plants.
Achieving near-perfect singulation isn’t luck; it’s the result of a disciplined, systematic calibration process. It requires treating the planter not as a simple implement, but as a high-precision delivery system. Every component must be dialed in for the specific seed size and shape you are planting that day. Simply setting the vacuum and heading to the field is a recipe for mediocrity. High-performance planting demands a pre-flight check of the four pillars of singulation.
The financial incentive for this level of detail is direct and significant. Agronomists widely agree that every 1% improvement in singulation accuracy can add 1-2 bushels per acre to your final yield. Moving from a typical 95% singulation to an elite 99% can mean an extra 4-8 bushels per acre, a massive return for a few hours of calibration work. It is the foundational step that sets the ceiling for everything else you do all season.
- Pillar 1: Seed Meter Calibration. This is the heart of the system. You must adjust your seed disk or finger pickup settings to perfectly match the size and weight of the seed lot you are currently using. A different hybrid or even a different lot of the same hybrid may require a new setting.
- Pillar 2: Vacuum/Air Pressure. This is the primary force holding the seed to the disk. It must be set high enough to prevent skips but not so high that it causes doubles. This is the most frequent adjustment needed in the field.
- Pillar 3: Seed Lubrication. The use of talc, graphite, or a blend is non-negotiable. It ensures seeds flow smoothly into the meter and reduces static and friction that can impair singulation.
- Pillar 4: Ground Speed Optimization. Excessive speed causes planter unit bounce and vibration, which directly degrades seed spacing uniformity, even with perfect meter performance. Adhering to the manufacturer’s recommended speed range is critical.
Stop guessing and start measuring. Implement these calibration and diagnostic strategies today to turn your yield potential into harvested bushels and finally push past the plateau that’s been holding you back.