
Achieving a decade or more of peak performance from a drip system depends less on routine tasks and more on mastering the pre-emptive timing and chemistry of interventions.
- System failure is rarely sudden; it’s a cascade of preventable chemical, biological, and physical events.
- Proactive diagnostics—using system pressure and temperature as guides—can detect stress days before plants show symptoms.
Recommendation: Shift from a reactive cleaning schedule to a predictive maintenance strategy based on your specific water chemistry, terrain, and system feedback.
For an orchard manager, a micro-irrigation system represents a significant capital investment, one that is foundational to the health and productivity of your crops. The promise of efficiency is compelling; after all, well-designed systems use 20-50% less water than conventional methods. However, the path to a decade-plus lifespan for this critical infrastructure is littered with failures. Standard advice often revolves around generic checklists: flush your lines, check your filters, and watch for leaks. While not wrong, this approach is fundamentally reactive and fails to address the root causes of system degradation.
Most premature failures are not due to a single catastrophic event but a slow, cascading series of preventable problems. It starts with a subtle shift in water chemistry, leading to microscopic mineral precipitation. This creates a rough surface for biofilm to anchor and grow. Reduced flow from this buildup then encourages root intrusion near the emitters. The real key to longevity isn’t just performing maintenance tasks; it’s understanding the underlying physics, biology, and chemistry to intervene at the right moment, with the right technique, to stop these cascades before they begin.
This guide moves beyond the basics to focus on the strategic, science-backed interventions that truly protect your investment. We will deconstruct the most common and costly failure points—from the physics of pressure on slopes to the chemistry of fertilizer injection—and provide the specific protocols to preempt them. By mastering these principles, you can transform your maintenance routine from a chore into a strategic asset protection plan, ensuring your system operates at peak efficiency for a decade or more.
To navigate these advanced strategies, we have broken down the critical knowledge areas into a clear, actionable sequence. The following sections will guide you through the specific failure modes and the expert-level techniques required to ensure long-term system integrity and performance.
Summary: A Practical Guide to Extending Drip Line Lifespan
- Why Non-PC Emitters Fail on Hilly Terrain?
- How to Flush Drip Lines to Remove Biofilm Buildup?
- Buried or Surface Drip: Which is Safer from Rodents?
- The Chemical Injection Mistake That Allows Root Intrusion
- When to Inject Calcium to Avoid Emitter Precipitation?
- How to Build a Commercial Hydroponic Setup in a Warehouse?
- The Filtration Oversight That Clogs Emitters with Salt
- How to Detect Water Stress 3 Days Before Symptoms Appear?
Why Non-PC Emitters Fail on Hilly Terrain?
On undulating terrain, the most common and costly mistake is using non-pressure-compensating (non-PC) emitters. The reason for their failure isn’t a defect in the emitter itself, but a simple matter of physics. Water pressure in a drip line changes with elevation: it decreases as you go uphill and increases as you go downhill. For every foot of elevation change, pressure changes by approximately 0.433 PSI. In a non-PC system, this directly impacts flow rate. Emitters at the lowest point of a slope can release significantly more water than intended, while emitters at the highest point release far less. This pressure differential failure creates zones of over-watering and under-watering within the same irrigation block.
The consequences are severe. Chronically under-watered plants at higher elevations suffer from stress, reduced growth, and lower yields. Meanwhile, over-watered plants at the bottom of the slope are at risk of root rot and nutrient leaching, wasting both water and fertilizer. Over time, this inconsistent irrigation leads to a dramatic lack of crop uniformity, a problem that is often misdiagnosed as a nutrient deficiency or soil issue. The only true solution for slopes is using pressure-compensating (PC) emitters, which use an internal diaphragm to maintain a consistent flow rate across a wide range of pressures. For existing non-PC systems on slopes, diagnosing the extent of the problem is the first step toward mitigation.
Your Action Plan: Diagnosing Flow Variations on Slopes
- Measure flow rates at the highest and lowest points of your slope; a variation over 15% in a non-PC system indicates a significant problem.
- Check for sediment accumulation at low-point emitters after each irrigation cycle, as lower flow velocity at high points can cause particles to settle.
- Monitor pressure differentials by installing inline gauges at key elevation changes to quantify the pressure loss or gain.
- Document emitter failure patterns monthly to identify “cascade effect” zones where clogging is accelerating due to flow issues.
- Calculate the compounded yield deficit annually by comparing actual flow data against the expected, uniform flow rate.
How to Flush Drip Lines to Remove Biofilm Buildup?
Flushing drip lines is standard advice, but a simple water flush is often insufficient to combat the primary cause of biological clogging: biofilm. Biofilm is a slimy matrix of bacteria, algae, and organic debris that adheres to the inner walls of drip lines and emitters. This buildup not only restricts water flow but can also create an environment for plant pathogens. According to experts, this organic accumulation is a leading cause of system failure. Research from Clemson Extension highlights that biological clogging causes up to 50% of all drip system failures, making its removal a top priority.
Effective removal requires a chemical approach. The key is to inject a powerful oxidizing agent that can break down the organic matrix without harming the system components. The same Clemson study demonstrates that a targeted chemical treatment is highly effective. This involves injecting a specific concentration of an oxidizing agent during the final phase of an irrigation cycle.
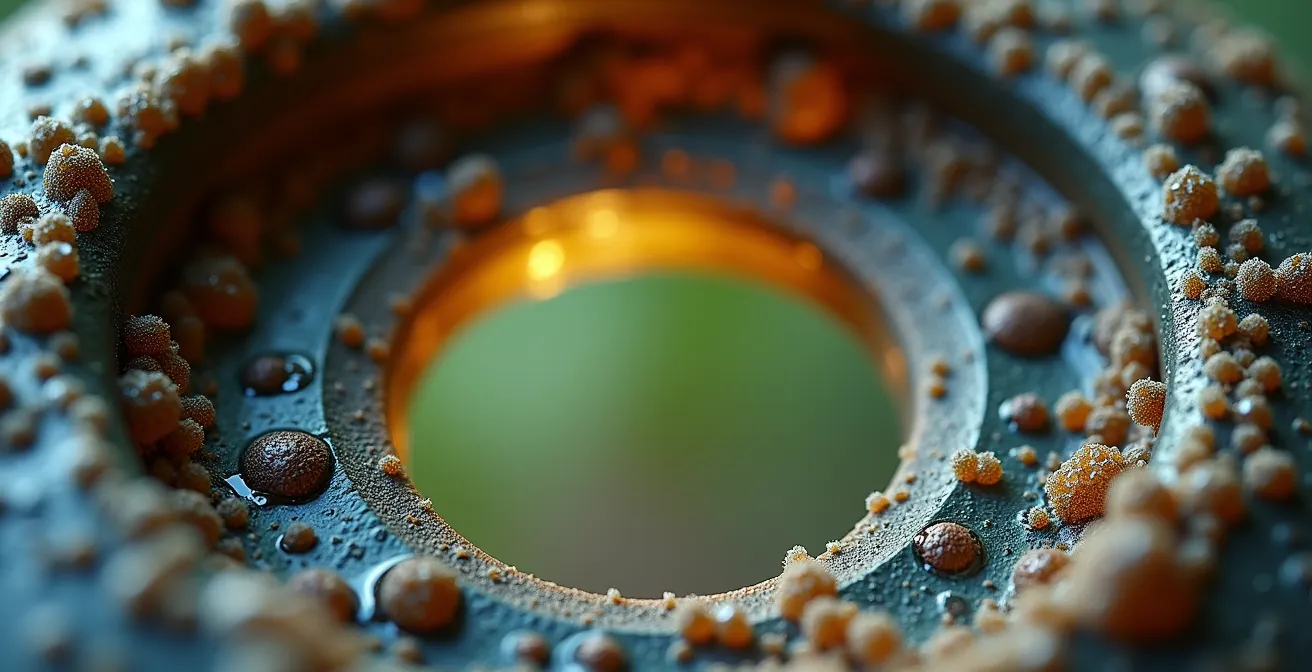
The most effective strategy involves injecting hydrogen peroxide (H2O2). The research recommends using a 35% H2O2 solution at a rate of 0.5-1.0 gallon per 1,000 gallons of water. This should be injected during the last hour of irrigation. This “shock treatment” allows the chemical to circulate throughout the entire system, dissolve the biofilm, and exit through the emitters, effectively scouring the lines from the inside out. Crucially, maintaining a system pH between 6.0 and 6.5 during this process helps prevent mineral precipitation, ensuring you are solving one problem without creating another.
Buried or Surface Drip: Which is Safer from Rodents?
The decision to install drip lines on the surface or to bury them as Subsurface Drip Irrigation (SDI) involves a crucial trade-off between operational risks. While surface lines are easier to inspect, they are highly vulnerable to damage from rodents, UV degradation, and mechanical equipment. Rodents like gophers and squirrels are attracted to the water and can cause extensive damage by chewing through the lines. SDI, by contrast, buries the laterals below the tillage zone, offering significant protection from these surface-level threats.
Burying the lines makes them a less obvious target for most rodents and completely shields them from UV radiation, a primary cause of plastic degradation. It also protects them from being damaged by cultivators, sprayers, and other farm machinery. However, SDI is not without its own risks, primarily root intrusion and the challenge of detecting leaks. Despite a higher initial installation cost, the long-term economic benefits of SDI are substantial due to dramatically reduced maintenance and replacement costs. As the University of Arizona Cooperative Extension notes, this durability is a key advantage.
Subsurface drip irrigation systems have examples that have been in service for over 20 years when properly maintained
– University of Arizona Cooperative Extension, Seasonal Maintenance Practices for Drip and Sprinkler Irrigation Systems
The following table, based on a long-term risk assessment, quantifies the differences in operational cost and longevity, showing a clear advantage for SDI in permanent crop installations.
| Risk Factor | Surface Drip | Subsurface Drip (SDI) | 10-Year Cost Impact |
|---|---|---|---|
| Rodent Damage Frequency | High (visible target) | Moderate (buried) | Surface: +30% maintenance |
| UV Degradation | Severe (direct exposure) | None (protected) | Surface: Replace after 7-10 years |
| Mechanical Damage | High (cultivation risk) | Low (below tillage) | Surface: 15% annual damage |
| Material Options | Standard PE/PVC | HDPE with anti-rodent additives | SDI: +20% initial cost, -40% repairs |
| System Longevity | 7-10 years average | 15-20+ years with maintenance | SDI: 2x lifespan potential |
The Chemical Injection Mistake That Allows Root Intrusion
For Subsurface Drip Irrigation (SDI) systems, root intrusion is the single most destructive threat. Plant roots are naturally drawn to the water and nutrients emitted from drip lines and can quickly grow into and block the emitters. The standard defense is chemigation with a root-inhibiting herbicide like Trifluralin. However, the effectiveness of this treatment hinges on a single, often-missed procedural detail. The goal is not just to kill existing roots but to create a persistent chemical barrier around the emitter.
The most common mistake managers make is flushing the lines with fresh water after injecting the herbicide. This action, while logical for other chemical treatments, completely undermines the purpose of root-inhibiting chemigation. Flushing washes the herbicide out of the system, leaving the emitters unprotected until the next irrigation cycle. The correct protocol requires the herbicide solution to remain in the lines between irrigation events, creating a protective zone that repels roots continuously. When this is done correctly, the longevity of the system is dramatically increased. Well-maintained drip systems can last 15-20 years, compared to less than 10 for those with recurring root intrusion issues.
Adhering to the correct injection protocol is non-negotiable for the long-term health of an SDI system. The following steps, adapted from industry best practices, outline the correct procedure:
- First, complete your regular irrigation cycle fully without any chemical injection to ensure plants are hydrated.
- After the main irrigation cycle concludes, inject Trifluralin at a concentration of 0.5-1 ppm for a duration of 15-30 minutes.
- Do not flush the lines with fresh water after the herbicide injection. This is the most critical step.
- Allow the chemical barrier to remain in the lines, creating a protective zone around the emitters between irrigation cycles.
- Monitor for any signs of root intrusion monthly. A successful treatment will show zero new root penetration into emitters after six months.
When to Inject Calcium to Avoid Emitter Precipitation?
Fertigation is a cornerstone of modern agriculture, but it can also be a primary source of emitter clogging if not managed correctly. The most frequent issue is chemical precipitation, where soluble fertilizers react with each other or with minerals in the water to form insoluble solids. A classic and costly example is the interaction between calcium and phosphate. Many growers use calcium nitrate for plant structure and a phosphate-based fertilizer (like diammonium phosphate) for energy transfer, but injecting them together is a recipe for disaster.
When calcium and phosphate are mixed at high concentrations within the confines of a drip line, they react to form calcium phosphate, a white, rock-like precipitate that is nearly impossible to remove and will permanently clog emitters. This is not a gradual buildup; it’s an immediate chemical reaction. A Clemson University study on fertilizer incompatibility documented this precise reaction, confirming it as a major operational hazard in commercial production.

The solution lies not in avoiding these essential nutrients, but in mastering the timing of their injection. To prevent precipitation, incompatible chemicals must never meet at high concentrations within the system. The research from Clemson provides a clear, practical recommendation: implement separate injection schedules. For instance, inject all phosphate-based fertilizers during Monday’s irrigation cycle and all calcium-based fertilizers during Thursday’s cycle. This separation ensures that any residual from the first chemical is flushed from the system long before the second, incompatible chemical is introduced, completely preventing the damaging precipitation reaction.
How to Build a Commercial Hydroponic Setup in a Warehouse?
While orchards and vineyards operate in the field, managers can learn valuable lessons from the zero-tolerance world of commercial hydroponics. In a warehouse setup where every drop of water is precisely controlled and root systems are entirely dependent on the irrigation system, there is no margin for error. Clogging is not an inconvenience; it’s a catastrophic crop failure. Therefore, hydroponic systems are designed with a level of redundancy and precision monitoring that can serve as a gold standard for any high-value irrigation setup.
The core principle is zero-tolerance clogging prevention. This philosophy moves beyond periodic maintenance to a system designed for continuous, automated self-protection. This includes using multiple layers of filtration, choosing materials resistant to chemical degradation, and implementing automated monitoring that can flag a potential issue before it impacts flow rates. For an orchard manager with a high-density, high-value planting, adopting these principles can mean the difference between a 7-year system and a 20-year one.
The following protocol, inspired by best practices in commercial hydroponics, outlines a system designed for maximum reliability:
- Install redundant filtration: Use a primary disc filter (e.g., 200 mesh) to handle bulk particulates, followed by a secondary screen filter (e.g., 150 mesh) as a failsafe.
- Deploy inline flow sensors: Place sensors on each main lateral with automated alerts that trigger if flow deviates by more than 5%, indicating a localized clog or leak.
- Use rated materials: Ensure all pipes and components are UPVC or HDPE rated for continuous exposure to the pH range of your water and nutrient solutions (typically pH 4-8).
- Implement weekly preventative circulation: Run a low-concentration hydrogen peroxide solution (e.g., 50ppm) through the system for one hour weekly to prevent any biofilm from establishing itself.
- Log and monitor flow rates daily: Any system-wide flow reduction of 10% or more should trigger an immediate and thorough maintenance inspection.
The Filtration Oversight That Clogs Emitters with Salt
When emitters clog with a white, crystalline substance, the culprit is often identified as “salt,” but the true cause is frequently a filtration oversight combined with water chemistry. The substance is typically calcium carbonate (limescale), and its formation is triggered by a sudden change in water pH. This is particularly common in systems using well water high in bicarbonates. While the water may be clear initially, a hidden process is at work within your filtration unit.
Research from the University of Arizona Extension revealed a critical mechanism: the pressure drop that occurs as water passes through a filter (especially a disc or screen filter) can cause dissolved CO2 to “gas off,” or come out of solution. Since dissolved CO2 forms carbonic acid, its removal instantly causes the water’s pH to rise. If the water is already high in calcium bicarbonate, this pH spike is enough to cause the calcium to precipitate out of solution and form solid limescale *after* the filter. This post-filter precipitation is why emitters can clog even with a seemingly effective filtration system in place.
The solution is to stabilize the water chemistry *before* it reaches the filter. This involves the pre-injection of a mild acid, such as phosphoric acid, to lower the pH and keep the calcium bicarbonate in a stable, soluble state throughout the entire system. Furthermore, selecting the right type of filter for your specific water source is the first line of defense. A sand media filter, for example, is far more effective against organic matter from surface water, while a disc filter is better suited for the mineral content of well water.
| Water Source | Primary Contaminant | Recommended Filter | Maintenance Frequency |
|---|---|---|---|
| Surface Water (pond/canal) | Organic matter, algae | Sand media filter | Backflush weekly |
| Well Water (high bicarbonate) | Calcium carbonate | Disc filter + acid injection | Clean monthly, acid weekly |
| Reclaimed Water | Mixed biological/chemical | Sand + disc combination | Inspect bi-weekly |
| Municipal Water | Minimal, chlorine residual | Screen filter (150 mesh) | Check quarterly |
Key Takeaways
- System longevity is determined by proactive chemical management, not just reactive cleaning.
- Incompatible fertilizers (like calcium and phosphate) must be injected on separate days to prevent immediate precipitation and clogging.
- The biggest mistake in root intrusion prevention is flushing lines after herbicide injection; the chemical barrier must remain in the pipes.
How to Detect Water Stress 3 Days Before Symptoms Appear?
By the time you can visually see signs of water stress in your crops—such as wilting leaves or a change in color—yield potential has already been lost. The ultimate goal of a high-performance irrigation system is to prevent stress, not just react to it. A perfectly maintained system can become a powerful diagnostic tool, allowing you to “listen” to your plants and detect water needs days before they become visible problems. This involves shifting from being an irrigator to being a system diagnostician.
The key is to monitor two simple but powerful metrics: pressure and temperature. A subtle, system-wide increase in pressure can indicate the beginning of widespread micro-clogging long before flow rates are significantly impacted. On the plant side, canopy temperature is a direct indicator of water status. A healthy, well-hydrated plant actively cools itself through transpiration, keeping its leaf surface temperature several degrees cooler than the ambient air. A plant beginning to experience water stress will reduce transpiration to conserve water, causing its leaf temperature to rise. Using a handheld infrared thermometer, you can spot these “hot spots” in your orchard and identify areas needing attention.
This proactive monitoring allows for targeted interventions, saving water, energy, and most importantly, protecting your yield. It transforms the irrigation system from a simple water delivery network into the sensory nervous system of your entire operation. The following protocol outlines the key steps for early water stress detection:
- Install pressure gauges on sub-mains every 300 feet. A sustained 2 PSI increase from baseline indicates the onset of micro-clogging.
- Use a handheld infrared thermometer daily around 2 PM to scan the canopy temperature of your crops.
- Healthy plants should be 2-5°F cooler than the air temperature; stressed plants will match or exceed the air temperature.
- Monitor the total system flow rate weekly. A consistent 10% reduction in flow often precedes visible plant stress by as much as 72 hours.
- For high-value crops, implement pre-dawn leaf water potential testing with a pressure chamber for the most accurate measure of plant water status.
By integrating these advanced maintenance and diagnostic strategies, you can protect your infrastructure, ensure crop uniformity, and confidently manage your irrigation system for a decade of reliable service. To begin implementing these protocols, the next logical step is to conduct a full diagnostic audit of your current system’s performance and chemistry.