Contrary to popular belief, simply slowing down your rotor is not the key to eliminating cracked grain; it can even make things worse.
- True grain quality comes from achieving “threshing equilibrium,” where rotor speed and concave clearance work in tandem to match crop conditions.
- Misdiagnosing the cause of rotor loss often leads to incorrect adjustments that overload the sieves and paradoxically increase grain damage.
Recommendation: Focus on managing the crop flow velocity through the rotor to enable gentle, grain-on-grain threshing instead of aggressive, high-impact separation.
For any seed producer or food-grade grain farmer, the sound of cracked kernels hitting the grain tank is the sound of diminishing profits. Every damaged kernel represents a quality penalty and a direct hit to the bottom line. The conventional wisdom has always been straightforward: if you see cracked grain, slow the rotor down. While this advice isn’t entirely wrong, it oversimplifies a complex dynamic. It treats the rotor as an isolated component, ignoring its intricate relationship with concave clearance, material flow, and the cleaning system.
The real challenge isn’t just about reducing impact, but about maintaining threshing efficiency. Slowing the rotor too much can lead to poor separation, carrying an un-threshed mat of grain and Material Other than Grain (MOG) over the back and overloading the sieves. This can ironically lead to more grain being lost out of the combine than was saved from cracking. The secret to pristine grain quality lies not in a single setting, but in a holistic understanding of the machine’s internal environment.
This guide moves beyond the simple “slow down” mantra. We will explore the concept of threshing equilibrium—the precise balance point where the crop is threshed by rubbing, not by beating. It’s a systems-based approach that views rotor speed as just one part of a larger equation involving concave settings, transport vane positions, and even fan speed adjustments. By understanding these interactions, you can preserve the integrity of every kernel while maximizing throughput and minimizing loss.
This article provides a detailed framework for mastering your combine’s settings. We will dissect the mechanics of different rotor systems, provide specific setting parameters for various crop conditions, and debunk common myths that lead to costly mistakes in the field.
Summary: A Technical Guide to Preserving Grain Quality
- Why Axial Rotors Damage Less Grain Than Tangential Cylinders?
- How to Set Concaves for Easy-Threshing vs. Hard-Threshing Wheat?
- Standard or Rice Rotor: Which Handles Green Straw Better?
- The Rotor Loss Mistake That Overloads the Sieves
- When to Adjust Transport Vanes to Slow Down Crop Flow?
- Why Increasing Fan Speed Doesn’t Always Clean the Sample?
- Why Harvesting Corn at 25% Moisture Kills Your Profit Margin?
- How to Grow Potatoes That Meet Fry-Processors’ Specifications?
Why Axial Rotors Damage Less Grain Than Tangential Cylinders?
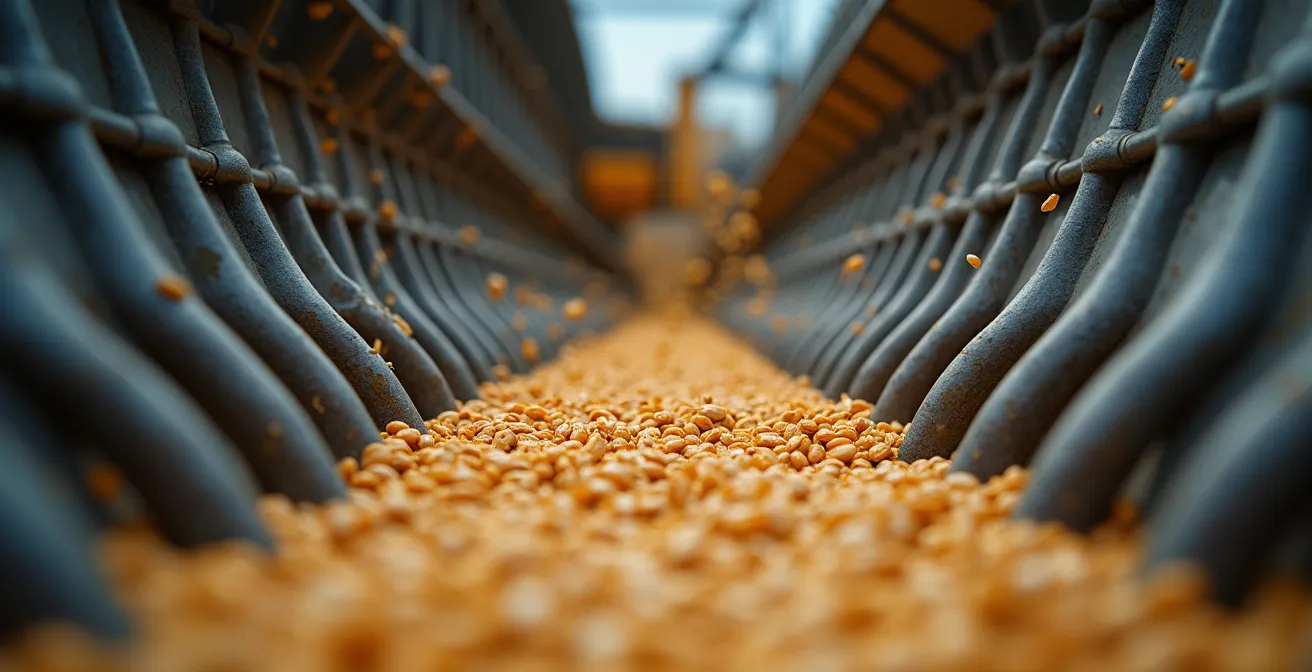
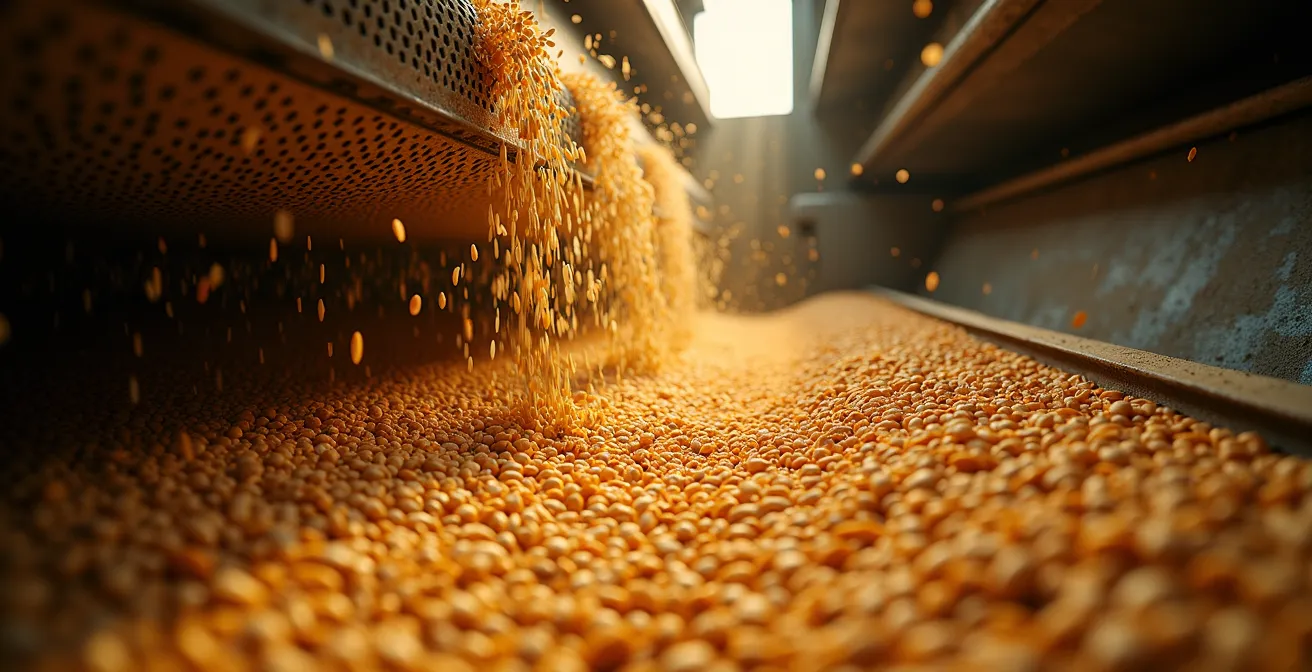
The fundamental advantage of an axial-flow rotor lies in its method of threshing. Unlike a tangential cylinder that relies on a single, high-impact strike between the cylinder bar and the concave, an axial rotor creates a gentler, multi-pass process. The crop mat spirals around the rotor multiple times, creating grain-on-grain threshing. This rubbing action is far less aggressive than a direct impact, significantly reducing the risk of cracked kernels, especially in delicate or dry crops. The entire system is designed for high-capacity, low-damage separation.
This gentler process, however, is highly sensitive to adjustments. Even a minor deviation from the optimal speed can have a significant impact. For instance, an 110 RPM change in rotor speed can result in significant grain loss, either through incomplete threshing or excessive damage. The key is to find the slowest possible speed that still achieves complete separation from the straw or cob. The illustration below visualizes the core difference in material movement between the two systems.

As the visual suggests, the spiral flow of the axial system promotes a continuous, rubbing motion, whereas the tangential system is defined by a forceful, singular impact point. Achieving this gentle efficiency requires a systematic approach to setting the rotor speed, not guesswork. Following a clear procedure is the first step toward mastering this balance.
Your Action Plan: Finding the Optimal Rotor Speed
- Establish a Baseline: Start the combine with an empty grain tank and clean sieves to accurately assess initial performance.
- Gradual Increase: With the machine engaged in the crop, slowly increase the rotor speed in small increments until the very first signs of cracked kernels appear in the grain tank sample.
- Immediate Reduction: As soon as any damage is visible, immediately reduce the rotor speed by 10-20 RPM. This is your initial optimal setting.
- Continuous Monitoring: Constantly monitor the grain stream from the clean grain elevator and check the grain tank for any changes in damage indicators.
- Inspect the Discharge: Check for split cobs or damaged straw in the discharge stream, which often indicates that the concave clearance is too tight, creating excessive pressure independent of rotor speed.
How to Set Concaves for Easy-Threshing vs. Hard-Threshing Wheat?
While rotor speed controls the force of impact, concave clearance determines the pressure and space available for threshing. It’s a critical part of the threshing equilibrium. For wheat, the ideal setting is highly dependent on crop conditions. Easy-threshing varieties in dry conditions require a wider concave setting to prevent over-threshing and grain damage. In contrast, hard-threshing wheat or varieties with tough, damp straw demand a tighter clearance to ensure every kernel is separated from the head.
A common mistake is to set the concaves either fully open or fully closed. The goal is to create a “rubbing” pressure, not a grinding one. According to Case IH field trials, a good rule of thumb for many crops is to set the concave clearance to the thickness of the cob or head. For standard wheat, this often falls in the 15-25mm range. This setting allows the material to roll and rub against the concaves rather than tumble and break, which improves separation efficiency without causing damage. Adjusting this clearance is your primary tool for adapting to changing moisture and crop toughness throughout the day.
To provide a clearer picture of how these settings interact across different crops, consider the following general guidelines. As this comparative analysis of combine settings shows, each crop has a unique starting point for rotor speed and concave clearance based on typical moisture levels.
| Crop Type | Moisture Level | Rotor Speed (RPM) | Concave Setting |
|---|---|---|---|
| Corn | Standard (20-25%) | 350-450 | 18-25mm |
| Soybeans | Dry (<13%) | 550-650 | 15-25mm |
| Soybeans | Damp/Viney | 650-700 | 3-4 indicator |
| Wheat | Hard-threshing | 400-500 | Tighter clearance |
Standard or Rice Rotor: Which Handles Green Straw Better?
When harvesting in tough or high-moisture conditions, such as with green straw, material flow through the rotor becomes the limiting factor. Standard rotors are designed for dry, brittle crops and can struggle to move heavy, damp material, leading to blockages and poor separation. A rice rotor, with its more aggressive rasp bars and design, is specifically built to handle this type of challenging material, ensuring a consistent flow and effective threshing even in adverse conditions.
However, purchasing a dedicated rice rotor isn’t always necessary. A standard rotor can be modified to improve its performance in green straw. This often involves installing notched separator bars or interrupter bars to help break up the crop mat and encourage separation. For food-grade crops where kernel integrity is paramount, smooth rasp bars can be used to minimize mechanical damage. The key is to enhance the rotor’s ability to pull material through without it wrapping or clumping. In some cases, these modifications may require a slight adjustment in operation, as noted by technical experts. As the Wellington Implement Technical Guide points out in its PM-13830 Productivity Guide:
The AFX Rotor may require an additional 50 to 100 RPM Rotor Speed and a slightly tighter concave in some conditions.
– Wellington Implement Technical Guide, PM-13830 Productivity Guide
If you are working with a standard rotor in tough conditions, several modifications can significantly improve material handling:
- Install notched separator bars on the standard rotor to improve the flow of green material. Use 6 bars on smaller models (e.g., 2144, 2166) and 8 bars for larger combines.
- Consider using smooth rasp bars for food-grade crops to provide a gentler threshing action and minimize kernel damage.
- Add interrupter bars on later model combines (1992 and newer) to enhance separation by agitating the crop mat more aggressively.
- Adjust the transport vanes to the “slow” position to increase the time the material spends in the rotor cage, allowing for more thorough separation in tough MOG.
The Rotor Loss Mistake That Overloads the Sieves
One of the most common and costly mistakes operators make is misdiagnosing the cause of grain loss over the back of the combine. When the grain loss monitor spikes or kernels are found on the ground, the first instinct is often to assume the rotor speed is too high, causing it to “throw” grain out. In many situations, the exact opposite is true. Running the rotor speed too slow for the conditions prevents complete threshing and separation within the rotor cage.
This creates a dense, un-separated mat of grain and MOG that is carried over the top of the rotor. This entire mass is then dumped directly onto the cleaning system. The sieves, which are designed to separate a small amount of residual grain from chaff, become instantly overloaded by this massive volume of material. Unable to cope, the system expels everything—including perfectly clean grain—out the back of the machine. Field observations from specialists at Calmer Corn Heads confirm this frequent diagnostic error leads to significant, yet avoidable, losses.
This overload is a classic symptom of an imbalanced system. The problem isn’t the cleaning shoe; it’s the poor threshing performance upstream. The ultimate goal should always be to keep harvest losses to an absolute minimum, with many experts recommending a target of 1% or less of total grain yield. To correct this issue, instead of slowing the rotor further, the operator should consider slightly increasing rotor speed or tightening the concave clearance to improve initial separation. This ensures that only chaff and a minimal amount of grain reach the sieves, allowing them to function as intended.
When to Adjust Transport Vanes to Slow Down Crop Flow?
Transport vanes, located on the inside of the rotor cage, are a powerful but often overlooked adjustment for controlling grain quality and loss. Their angle determines the crop flow velocity—how quickly material moves through the threshing system. By adjusting the vanes, you can change the number of times the crop mat spirals around the rotor, directly influencing how long it is subjected to the threshing process. This is a critical tool for achieving threshing equilibrium.
In standard, easy-threshing conditions, the vanes can be set to a “fast” or “medium” position (angled to help pull the crop through) to maximize throughput. However, when dealing with tough, damp straw or high-yielding corn where separation is difficult, slowing down the crop flow is essential. By moving the vanes to the “slow” position (set nearly straight up-and-down), you force the material to spend more time in the rotor cage. This extended duration allows for more grain-on-grain rubbing and gives the system more opportunity to achieve complete separation before the MOG is discharged. This adjustment is particularly crucial for minimizing rotor loss in challenging conditions.
The adjustment protocol is specific and should be done systematically:
- For standard conditions, the front vanes are typically set in the medium position.
- In high-yielding, hard-to-thresh corn, move the rear five vanes to the slow position to maximize final separation.
- For soybeans, where horsepower can be a limiting factor, adjusting vanes to an “advanced” position can help material move through more quickly, reducing engine load.
- In a zero-rotor-loss setup, especially with straight bars on the rotor rear, having the vanes in the slow position (bottom facing the back of the combine) is critical.
Why Increasing Fan Speed Doesn’t Always Clean the Sample?
When faced with a dirty grain sample, the intuitive response is to increase the fan speed to blow more chaff and MOG out of the cleaning system. While this can work in ideal, dry conditions, it’s often an ineffective or even detrimental adjustment in others. The purpose of the fan is to create a pneumatic lift that stratifies the material entering the sieves: heavy grain should fall through, while lighter chaff is carried away by the airflow. If the fan speed is too high, it can blow clean, light-test-weight kernels right out the back along with the chaff, particularly in crops like wheat.
In high-moisture conditions, the problem is compounded. As field tests by John Deere have shown, corn harvested above 25% moisture can cause husks and wet trash to plug the shoe loss sensors, giving false readings. Furthermore, wet MOG is heavier and stickier, and simply increasing fan speed may not be enough to lift it off the sieves. In these cases, the issue is not a lack of airflow but an overloaded or improperly set chaffer and shoe. The solution might be to open the chaffer slightly to allow more material through, or to address an upstream problem like poor separation at the rotor which is overloading the entire system. Starting with a lower rotor speed (around 400 RPM) in wet corn can actually improve separator capacity without increasing damage, contrary to what one might expect.
The correct fan speed is a delicate balance, and general guidelines can provide a good starting point before fine-tuning for specific field conditions.
| Crop | Condition | Fan Speed (RPM) | Key Adjustment |
|---|---|---|---|
| Corn | Dry, whole cobs | 1100-1150 | Wider chaffer/shoe settings acceptable |
| Corn | High moisture (>25%) | 1000-1100 | Monitor for sensor plugging |
| Soybeans | Standard | 1050 | Avoid excessive speed to prevent loss |
| Wheat | Light test weight | 950-1050 | Reduce to prevent blowing out kernels |
Why Harvesting Corn at 25% Moisture Kills Your Profit Margin?
Harvesting corn when its moisture content is at or above 25% might seem like a way to get a head start, but it introduces a cascade of problems that directly erode profitability. At this moisture level, kernels are soft, swollen, and tightly attached to the cob. Separating them requires significantly more mechanical force, which translates into more aggressive combine settings and, inevitably, more damage. This is where the concept of threshing equilibrium becomes most critical and most difficult to achieve.
To thresh wet corn, operators are forced to increase rotor speed and tighten concave clearance, shifting from a gentle rubbing action to a violent beating one. This leads to several negative economic consequences. First, mechanical damage increases exponentially. Soft kernels are easily cracked or chipped by the aggressive settings. Second, as research from Bayer CropScience demonstrates, wet cobs are prone to breaking apart. If the accelerator speed is too fast, these broken cob pieces mix with the grain, overloading the cleaning system and leading to losses before threshing even properly begins. Keeping the rotor chamber full is essential to provide cushioning, but this is harder to manage with inconsistent, damp material.
Finally, the damage doesn’t end in the field. Every cracked kernel is an entry point for mold and disease during storage, and the high initial moisture content incurs substantial drying costs. Elevators will apply significant dockage fees for both excess moisture and damaged grain, delivering a final, painful blow to your profit margin. Waiting for corn to field-dry to a more optimal level below 22% might feel like a delay, but it pays dividends in reduced drying costs, lower mechanical damage, and a higher quality premium for your crop.
Key Takeaways
- The goal is “threshing equilibrium,” balancing rotor speed and concave clearance to match crop conditions, not just slowing the rotor.
- Rotor loss is often caused by a rotor speed that is too slow, which prevents separation and overloads the sieves with an un-threshed mat of material.
- Transport vanes are a critical tool for controlling crop flow velocity, allowing you to increase threshing time in tough conditions without increasing damage.
How to Grow Potatoes That Meet Fry-Processors’ Specifications?
Just as meeting the exacting specifications of a fry-processor for potatoes requires meticulous control over every variable from seed to storage, achieving pristine grain quality demands a similar level of precision inside the combine. The principles are the same: consistency, minimal damage, and optimizing for a specific end market. While analysis of global production shows that significant losses can occur even before the crop is touched by machinery, our focus has been on preserving the value of the yield that makes it to the harvester. The combine is the final quality control gatekeeper before storage, and its operation determines the profitability of your entire season.
Throughout this guide, we have deconstructed the myth of the “one-size-fits-all” setting. We established that minimizing cracked grain is not about one magic rotor speed, but about a dynamic threshing equilibrium. This balance is achieved by harmonizing rotor speed with concave pressure, managing crop flow with transport vanes, and ensuring the cleaning system isn’t being asked to fix an upstream threshing problem. A slow rotor can cause more loss than a fast one by overloading the sieves. An improperly set concave can negate a perfect rotor speed. Each component is part of an interconnected system.
Adopting this holistic view transforms you from an operator who reacts to problems into a specialist who anticipates them. By thinking in terms of crop flow velocity and grain-on-grain threshing, you can make proactive, data-driven adjustments that protect kernel integrity while maximizing the efficiency of your machine. This is the ultimate goal: to deliver a crop that meets the highest specifications, whether it’s destined for a seed bag, a food-grade processor, or a local elevator.
To put these strategies into practice, the next logical step is to begin systematically documenting your settings against field conditions and resulting grain quality. Start building your own dataset to turn these principles into profit.