
The common belief is that simply owning a moisture meter prevents spoilage; the reality is that profit is lost in a chain of uncalibrated sensors, unseen measurement errors, and flawed storage protocols.
- Inaccurate combine sensors and portable testers can create a false sense of security, leading to entire bins being stored at unsafe moisture levels.
- Improper drying and aeration techniques, stemming from bad data, directly cause quality degradation, stress cracks, and hot spots that destroy value.
Recommendation: Shift focus from just ‘taking a reading’ to auditing every step of your measurement process—from the field to the silo—to break the chain of financial loss before it starts.
For farmers who have watched profits disappear into a spoiled grain silo, the frustration is palpable. You followed the standard advice, monitored your bins, and still ended up with hotspots, mold, or mycotoxins. The conventional wisdom suggests that a grain moisture meter is the primary tool for prevention, yet losses continue to mount. This points to a deeper issue: spoilage is rarely a single catastrophic event. It is the final, costly result of a chain reaction of small, often invisible, technical errors in measurement and management.
The problem isn’t a lack of tools, but a lack of precision in how they are used. A reading on a meter is only as reliable as the calibration of the sensor, the sampling technique used, and the operator’s understanding of environmental variables. Relying on a single, unverified data point is a gamble. From phantom yield loss caused by harvesting too dry, to the subtle thermal gradients that form hot spots in an improperly aerated silo, each step presents an opportunity for error that compounds over time. This isn’t just about spoilage; it’s about test weight, grain quality, and ultimately, the check you get from the elevator.
This guide breaks that chain of failure. We will move beyond the superficial advice and dissect the critical technical details at each stage of the post-harvest process. By focusing on mastering the ‘why’ behind each measurement, you can transform your moisture meter from a simple gauge into a powerful tool for proactive financial protection. We will explore how to calibrate your equipment, optimize your drying strategy, and implement storage protocols that safeguard the value of every bushel you harvest.
For a visual overview of moisture testing equipment and its importance, the following video provides a practical demonstration of a professional-grade moisture meter in action.
This article is structured to guide you through each critical control point where moisture-related losses occur. By understanding the technical nuances of each step, you can build a robust system that protects your grain and your bottom line.
Summary: A Technical Roadmap to Preventing Grain Spoilage
- Why Harvesting Corn at 25% Moisture Kills Your Profit Margin?
- How to Calibrate Combine Sensors to Match Elevator Readings?
- Portable Testers or Bench Units: Which Trust for Storage?
- The Cooling Error That Creates Hot Spots in Silos
- How to Set Dryer Temps to Save Gas Without Cracking Grain?
- Why Increasing Fan Speed Doesn’t Always Clean the Sample?
- Why Waiting for Black Layer Prevents Test Weight Loss?
- How to Reduce Harvest Losses in High-Yielding Corn?
Why Harvesting Corn at 25% Moisture Kills Your Profit Margin?
The decision of when to start the combine is a high-stakes calculation between drying costs and field losses. While harvesting corn at 25% moisture seems like a direct route to hefty propane bills, the alternative—letting it dry down in the field—introduces a less visible but equally damaging cost: phantom yield loss. This phenomenon refers to the loss of kernel dry matter as the plant continues to respire after reaching maturity. The longer the grain sits in the field, the more potential yield is consumed by the plant itself, never making it into the grain tank.
The financial trade-off is stark. Recent field trials demonstrate that corn harvested at 26% moisture yielded 261.8 Bu/A, while the same crop harvested at 16% moisture only yielded 243.6 Bu/A. That difference of over 18 bushels per acre represents a significant revenue loss that often exceeds the cost of on-farm drying. Factoring in additional risks like stalk degradation, ear drop, and weather events only strengthens the case for an earlier, wetter harvest. The key is to run a precise cost-benefit analysis comparing your specific drying costs against the quantifiable financial penalty of field losses.
This isn’t just about bushels, but about the integrity of those bushels. Harvesting wetter preserves test weight and reduces the brittle, cracked kernels often associated with harvesting overly dry corn. The initial investment in drying is often recouped through higher yield and better grain quality at the elevator. Calculating your break-even point is the first step toward a more profitable harvest strategy, shifting the focus from simply minimizing drying costs to maximizing net income per acre.
How to Calibrate Combine Sensors to Match Elevator Readings?
One of the most common points of failure in the moisture management chain is the discrepancy between what your combine’s yield monitor reads and what the elevator’s certified scale reports. Relying on an uncalibrated or poorly calibrated combine sensor is like navigating without a compass. Decisions made in the cab based on this faulty data can lead to significant financial consequences, either through unexpected drying charges or unknowingly storing grain at an unsafe moisture level. The Precision Technology Institute farm study highlighted this, showing that harvesting at different moisture levels directly impacts income, with losses ranging from $12.65 to $33.63 per acre depending on the harvest moisture and drying costs.
Calibration is not a one-time “set and forget” task. It requires a methodical approach to ensure accuracy across the full range of field conditions. A simple single-point offset might seem sufficient on a uniform day, but it can become wildly inaccurate as moisture levels fluctuate. A multi-point calibration is the technical standard for achieving reliable data.
This process involves harvesting several (typically 3-5) small, weighed loads at different flow rates or speeds and comparing the combine’s reading to the certified weight from a grain cart or weigh wagon. The resulting data points are entered into the monitor to create a calibration curve, dramatically improving accuracy. While more time-consuming upfront, this method prevents costly errors down the line.
The table below, based on best practices from industry leaders like Bayer Crop Science, contrasts different calibration methods, illustrating the trade-off between time investment and data accuracy.
| Method | Accuracy Range | Implementation Time | Best Use Case |
|---|---|---|---|
| Single-Point Offset | ±2-3% | 15 minutes | Uniform field conditions |
| Multi-Point Calibration (3 points) | ±0.5-1% | 45 minutes | Variable moisture conditions |
| Continuous Calibration with ActiveYield | ±0.3% | Automatic | Real-time adjustment |
Portable Testers or Bench Units: Which Trust for Storage?
Once grain is out of the field, the responsibility for accurate moisture measurement shifts from the combine to dedicated testing units. The choice between a handheld portable tester and a larger, stationary bench unit is a critical decision that directly impacts the safety of your stored grain. While portable testers offer convenience for quick checks in the field or at the bin, they are generally more susceptible to environmental factors and operator variability. Bench units, often the same models used at commercial elevators, provide a more controlled and repeatable measurement environment, making them the gold standard for critical storage decisions.
The core difference lies in the sample size, temperature compensation, and measurement technology. Bench units typically use a larger grain sample, which minimizes the impact of a few outlier kernels. They also have more sophisticated, often internal, temperature correction algorithms. A portable tester used on a cold morning without allowing the grain sample to stabilize can produce a reading that is off by a full percentage point or more—a seemingly small error with massive financial implications. In fact, UK agricultural research shows that even a 0.5% reading error can be the difference between safe storage and the onset of mold, potentially leading to five-figure losses in a standard 10,000-bushel bin.
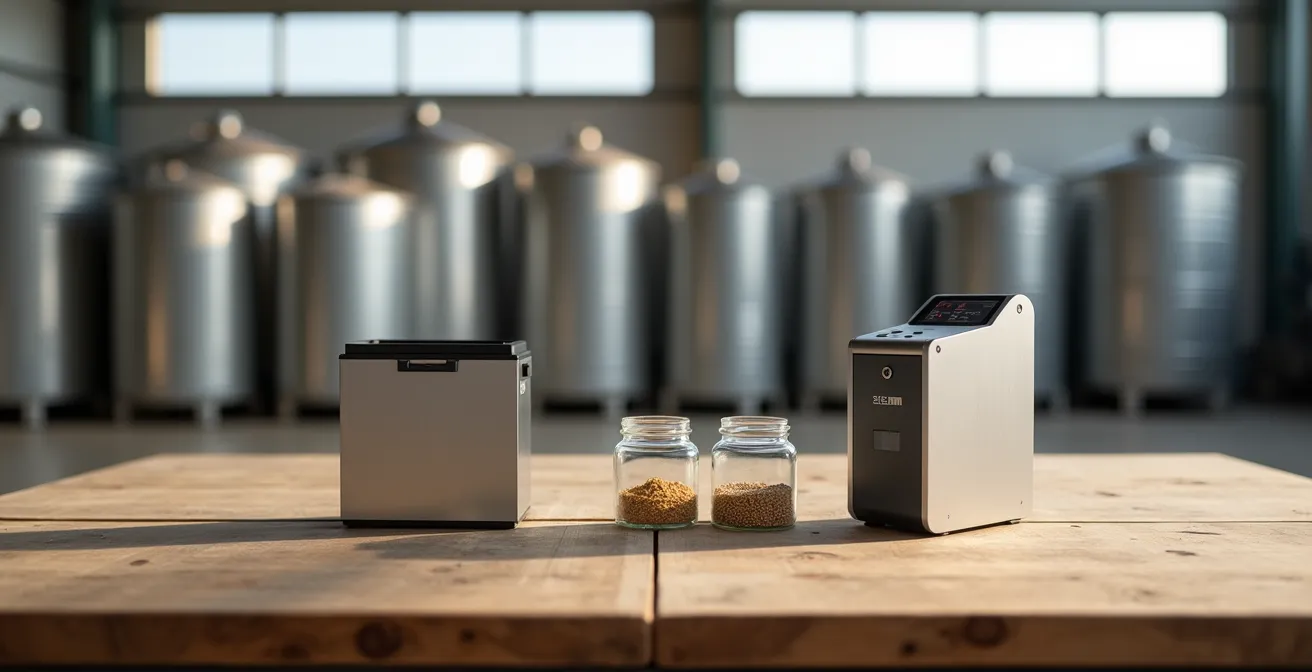
As the image illustrates, these two types of devices serve different roles. The portable meter is a scouting tool, ideal for assessing variability across a field. The bench unit is a management tool, providing the definitive reading upon which you base drying and storage decisions. The best practice is to use both: the portable meter to identify when a bin needs to be tested, and the bench unit to get the final, trustworthy number before sealing the bin for long-term storage. Trusting a convenient but less accurate tool for the most critical decision is a risk many farmers can no longer afford to take.
The Cooling Error That Creates Hot Spots in Silos
Getting grain into the silo at the correct moisture content is only half the battle. The most common and costly in-storage failure is the development of “hot spots”—localized areas of high temperature and moisture that become breeding grounds for mold, insects, and spoilage. These don’t form by accident; they are the direct result of a fundamental cooling error driven by moisture migration and temperature gradients within the grain mass.
When warm, freshly harvested grain is placed in a silo, the temperature is not uniform. The grain in the center of the mass retains heat, while the grain along the outer walls cools more quickly as ambient temperatures drop. This creates a thermal gradient, which initiates a slow-moving air convection cycle. Warm, moist air in the center of the bin rises, and as it reaches the cooler grain at the top surface, it releases its moisture, creating a wet, crusted top layer. Simultaneously, cool, dry air from the sides sinks, perpetuating the cycle. This process concentrates moisture in the upper central core of the bin, creating the perfect environment for spoilage. Simulations from a 2024 study on silo temperature migration confirm that without aeration, heat and moisture progressively accumulate in the center and bottom of the silo, with conditions worsening in warmer months.
Proper aeration is the only way to break this cycle. As the Cimbria Engineering Team notes in their guide to safe grain storage:
Proper aeration and grain cooling equipment control silo temperatures, creating an inhospitable environment for insects and fungi. This also eliminates the risk of ‘hot spots’ caused by unwanted biological activity.
– Cimbria Engineering Team, Safe grain storage: Combating post-harvest losses
The goal of aeration is not to dry the grain, but to equalize the temperature throughout the entire grain mass, eliminating the thermal gradients that drive moisture migration. Running cooling fans in cycles, especially during cool, dry periods, pulls the temperature down uniformly and creates a stable, safe environment for long-term storage.
How to Set Dryer Temps to Save Gas Without Cracking Grain?
For farmers harvesting wet corn to avoid phantom yield loss, the grain dryer becomes the most critical piece of post-harvest equipment. The central challenge is balancing two competing goals: removing moisture as efficiently as possible to save on fuel costs, while not applying so much heat that you damage the grain. Setting dryer temperatures too high can lead to stress cracking, where the outside of the kernel dries and shrinks much faster than the inside, causing internal fissures that reduce test weight and make the grain more susceptible to breakage during handling.
The maximum temperature a kernel can withstand without damage is a key metric. For corn destined for feed, the maximum kernel temperature should not exceed 140°F (60°C). Overheating not only causes physical damage but can also denature proteins and reduce the nutritional value of the grain. Furthermore, GEAPS research confirms that a drying rate above 5 percentage points per hour significantly increases the formation of stress cracks. This means a slow and steady approach is far superior to a fast, high-heat blast.

As this detailed image shows, stress cracks are internal fractures that compromise the structural integrity of the entire kernel. The optimal dryer temperature setting depends heavily on the initial moisture content, the type of dryer, and the grain’s end use (feed, food grade, or seed), with seed being the most sensitive to heat. The following table provides a general guideline for setting plenum temperatures for different grain types and uses, based on research from Purdue University Extension.
| Grain Type | Feed Use Temp (°F) | Food Grade Temp (°F) | Seed Use Temp (°F) | Max Kernel Temp |
|---|---|---|---|---|
| Corn | 200-220 | 170-190 | 110 | 140°F |
| Soybeans | 130-150 | 120-130 | 100 | 110°F |
| Wheat | 180-200 | 160-180 | 110 | 140°F |
Why Increasing Fan Speed Doesn’t Always Clean the Sample?
In the quest for a clean grain sample free of foreign material, many operators instinctively increase the combine’s fan speed. The logic seems sound: more air should blow more chaff and debris out the back. However, this approach often backfires, creating a new problem known as sample bias. An excessively high fan speed can be powerful enough to blow lighter, drier grain kernels out with the chaff, effectively skewing the moisture sample that reaches the grain tank. The combine’s sensor ends up reading only the heavier, wetter kernels that remain, creating an artificially high moisture reading.
This leads to a dangerous disconnect. The operator, trusting the monitor, may believe the corn is 18% moisture, when in reality, the true average moisture content of the grain going into the tank is closer to 16%. This can lead to over-drying, wasting fuel and potentially causing stress cracks. Conversely, if settings are wrong in another direction, lighter trash can be blown into the tank, where it is measured with the sample, again creating an inaccurate reading. According to Purdue Extension, rapid dry-down cycles in the field can exacerbate this issue, making precise settings even more critical.
Verifying that your in-cab reading is representative of the whole sample is crucial for making sound storage decisions. The only way to confirm this is to perform a manual check for sample bias.
Your 5-Step Audit for Eliminating Sample Bias
- Points of contact: Collect a sample directly from the clean grain auger before it enters the tank, and a second sample from the grain tank itself to establish two control points.
- Collecte: Use the same calibrated, high-quality moisture meter to test both samples, ensuring you are comparing apples to apples.
- Cohérence: Confront the two readings. If the moisture difference between the auger sample and the tank sample exceeds 0.5%, it’s a clear indicator of sample bias.
- Mémorabilité/émotion: Recognize that this small, measured bias on the monitor translates into a large, unmeasured risk across the entire bin.
- Plan d’intégration: If bias exists, systematically decrease fan speed and adjust chaffer and sieve settings accordingly. Retest until the two sample readings are coherent.
Why Waiting for Black Layer Prevents Test Weight Loss?
The concept of “black layer” is a critical agronomic benchmark that has direct financial implications at harvest. The black layer is a thin layer of cells that forms at the base of a corn kernel, signaling that it has reached physiological maturity. At this point, the connection between the kernel and the cob is severed, and no more dry matter (yield) can be added. Waiting for the black layer to form before harvesting is essential for maximizing test weight, a key factor in grain grading and pricing.
Harvesting before black layer formation means you are cutting the grain-fill period short, resulting in lighter, less dense kernels with lower test weight. While the grain may appear mature, it has not reached its full yield potential. As Dr. McNeill of the University of Kentucky explains:
Corn reaches physiological maturity, or black layer, when kernel moisture content is around 30%. The rate of grain drydown after maturity depends primarily on weather conditions after black layer but can also be affected by planting date, disease, and other factors.
– Dr. McNeill, University of Kentucky Grain Management Research
Once black layer is achieved, the only thing happening in the field is drydown. The decision then pivots back to the economic trade-off between mechanical drying costs and field losses. Letting the corn dry naturally in the field may save on propane, but it exposes the crop to yield loss from stalk lodging, ear drop, and wildlife. An economic analysis reveals that with corn at $4.00/bushel, a drying cost of $0.50/bushel is equivalent to a 12.5% harvest loss. If you anticipate field losses greater than this percentage, mechanical drying becomes the more profitable option. The key is that this decision should only be made *after* the crop has reached its maximum test weight potential at black layer.
Key Takeaways
- Grain spoilage is a chain reaction of small technical errors, not a single event.
- Uncalibrated sensors (combine and handheld) are a primary source of costly misinformation.
- Proper aeration to eliminate thermal gradients is as important as achieving the correct initial moisture content.
How to Reduce Harvest Losses in High-Yielding Corn?
Harvesting high-yielding corn presents a unique set of challenges. The sheer volume of material passing through the combine puts immense strain on every component, from the header to the cleaning shoe. In these conditions, small maladjustments can quickly escalate into significant bushel-per-acre losses. Reducing harvest loss in a bumper crop requires a dynamic approach to combine settings, especially when dealing with the variable moisture levels common in modern genetics.
A key insight from experts is to treat high-moisture corn harvesting with the same daily vigilance as soybean harvesting. As one expert noted in a Farm Progress study, settings may need to be adjusted in the morning, again at noon as the sun dries the crop, and again in the evening as dew sets in. A “one-size-fits-all” setting for the entire day is a recipe for loss. Slower travel speeds, wider concave settings, and optimized rotor speeds are essential to ensure gentle threshing and prevent kernel damage when corn is wet and soft.
The cleaning system also requires close attention. In high-moisture conditions, more material other than grain (MOG) will be present, requiring an increased fan speed to achieve proper separation. However, as discussed previously, this must be balanced to avoid blowing valuable kernels out the back. The goal is to find the sweet spot that results in a clean sample without sacrificing yield. The following table provides a starting point for adapting combine settings based on moisture content.
| Moisture Level | Rotor Speed | Concave Setting | Travel Speed | Special Considerations |
|---|---|---|---|---|
| >25% | Reduced 20% | Wider spacing | Slower 30% | Monitor for kernel damage |
| 20-25% | Standard | Normal | Normal | Optimal conditions |
| <20% | Increased 10% | Tighter | Can increase | Watch for fines generation |
To translate these technical insights into tangible profit, the next step is to conduct a full audit of your post-harvest process, from combine calibration to fan settings, and identify the weakest link in your own operational chain.